

How To Repair Plastic Manifold On Crown Victoria
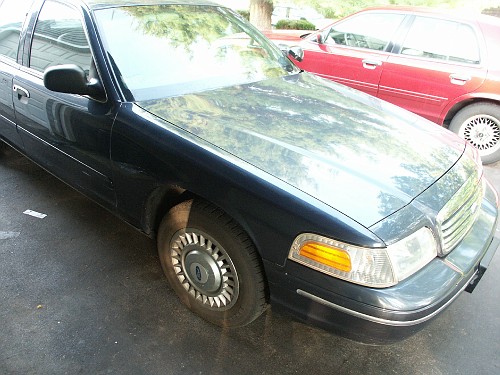
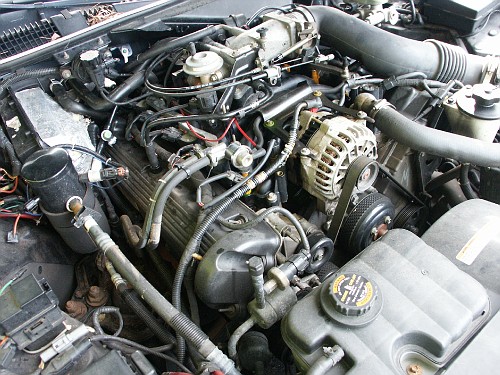
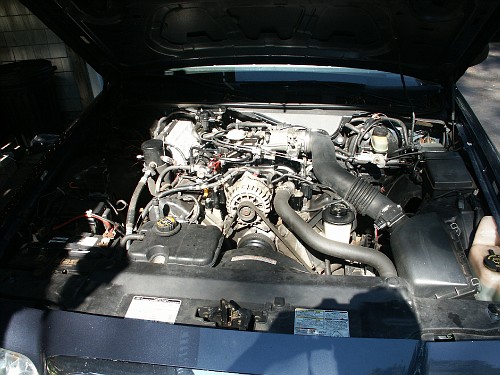
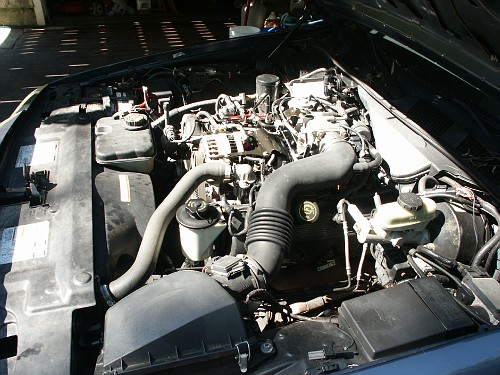
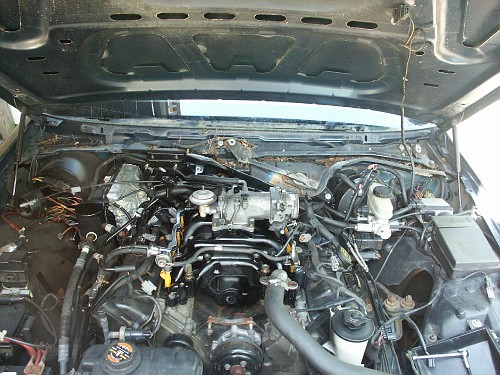
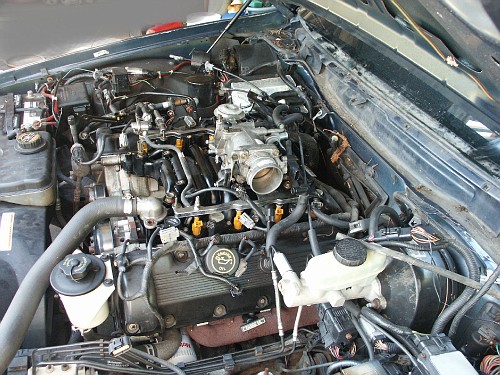
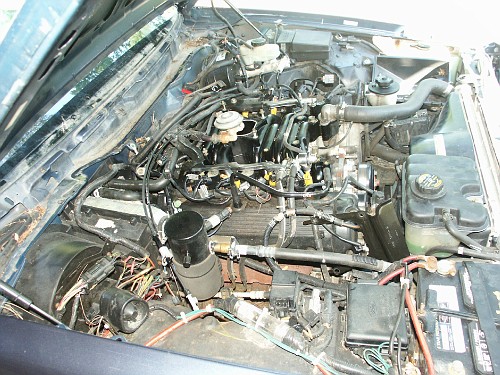
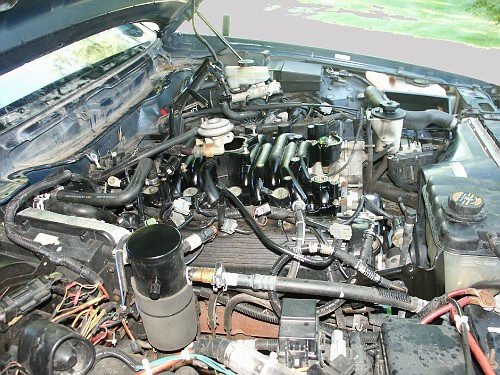
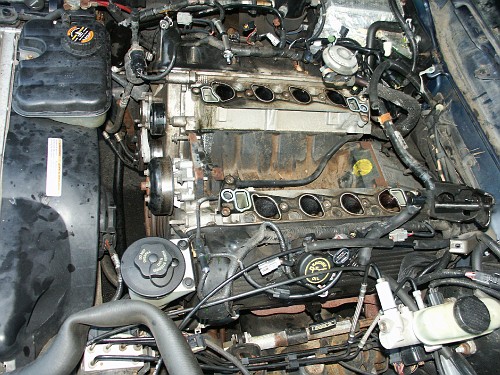
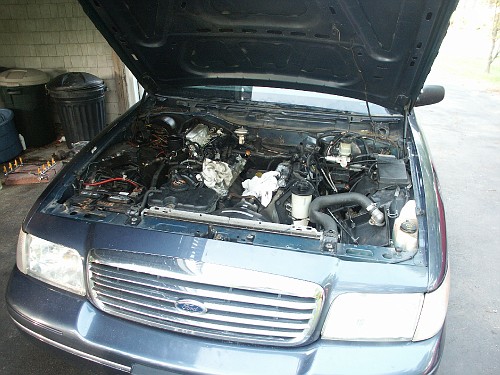
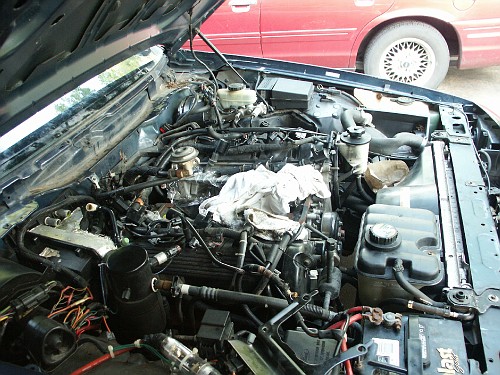
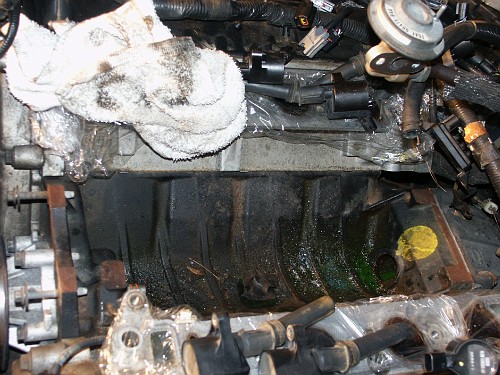
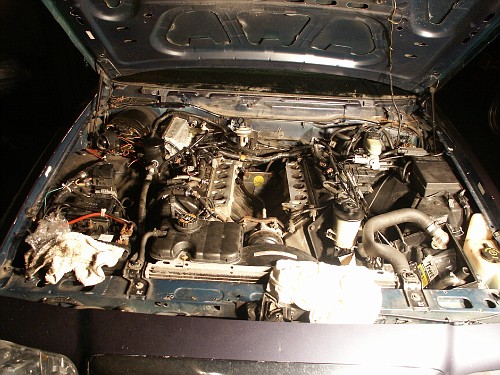
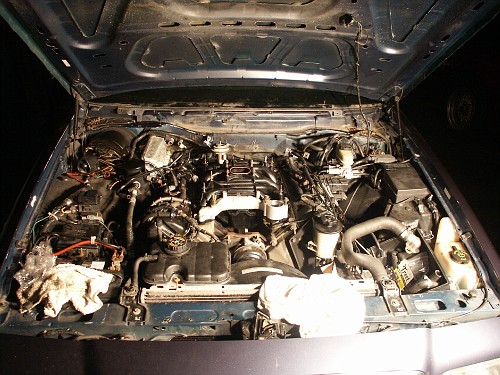
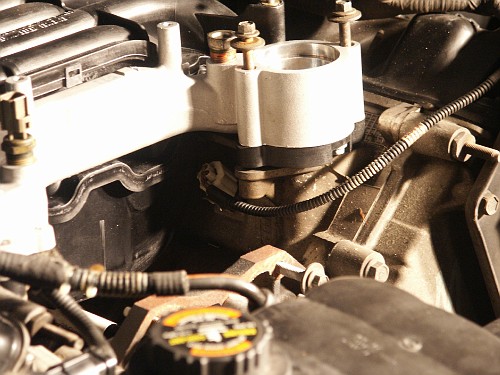
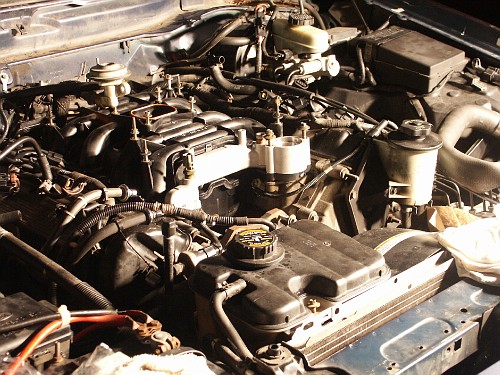
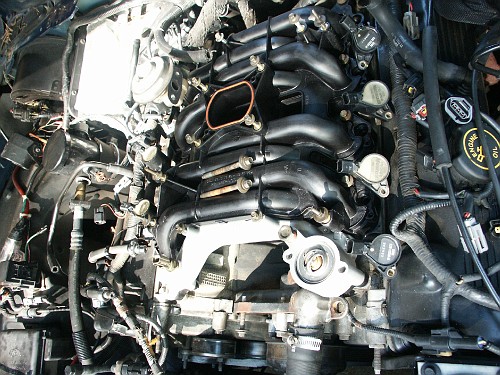
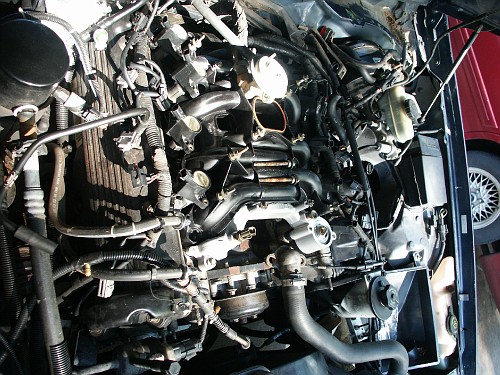
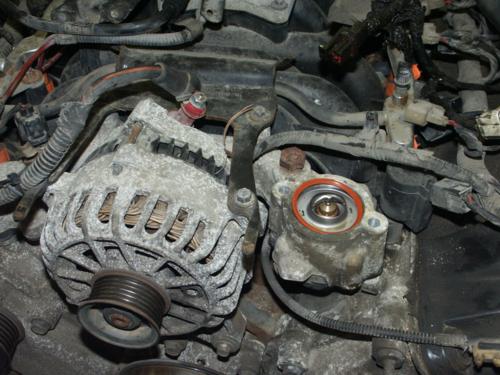
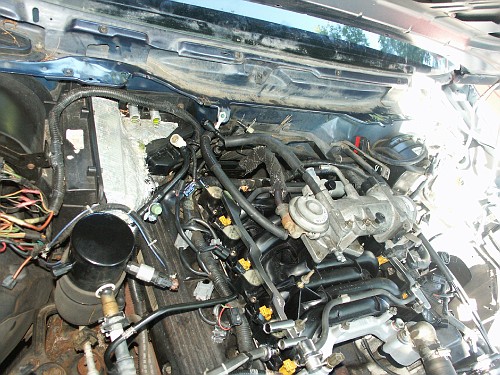
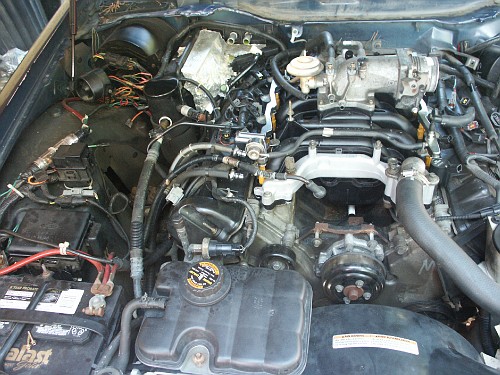
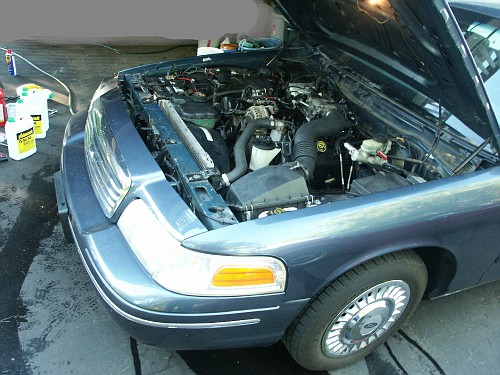
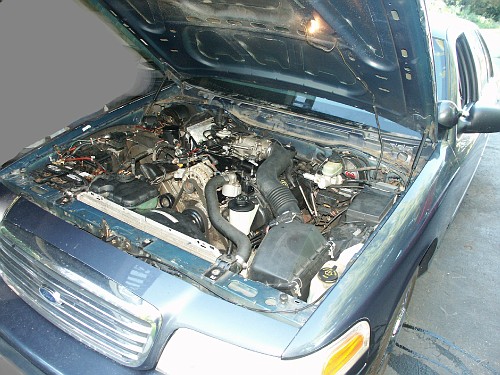
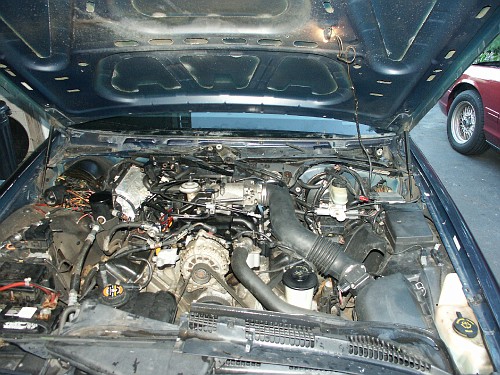
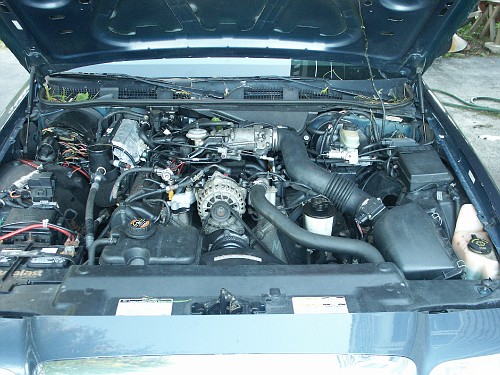
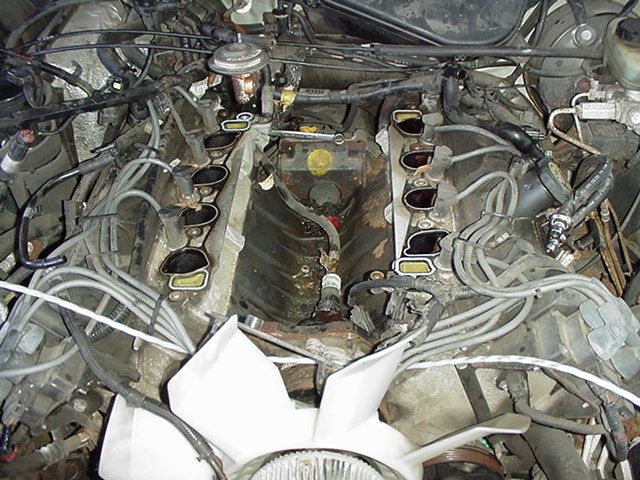
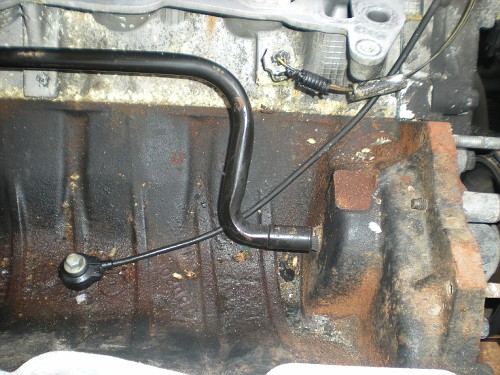
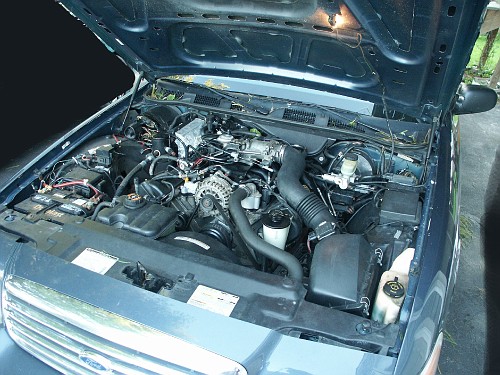
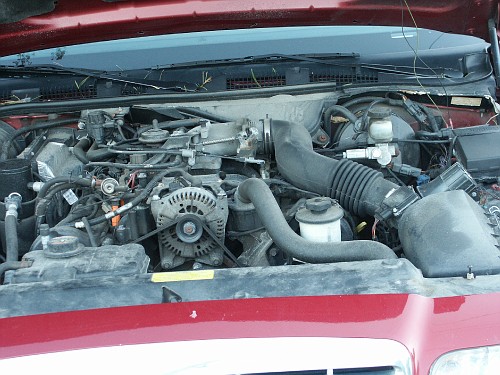
One solar day driving on the highway, I heard a hissing sound from under the hood while accelerating hard up a steep incline grade. A niggling while later, a slight odor of antifreeze was nowadays. When the car was stopped and the hood opened, bright light-green antifreeze was in places information technology shouldn't exist similar in the fuel injector well, on the back of the alternator, and the engine valley. Beneath are a couple pictures taken shortly afterwards this drive.

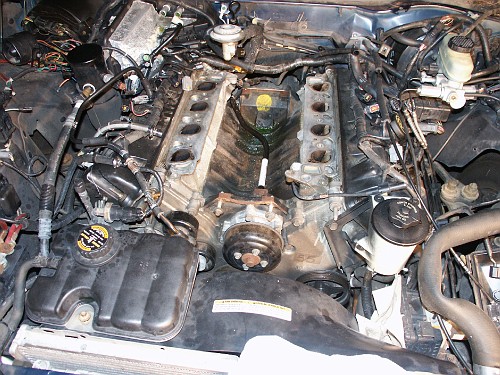
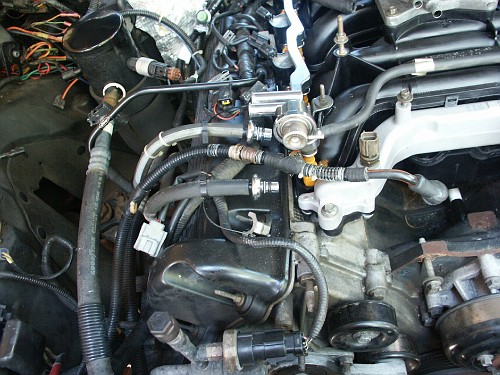
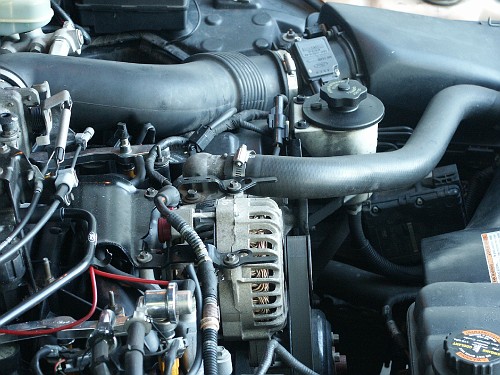
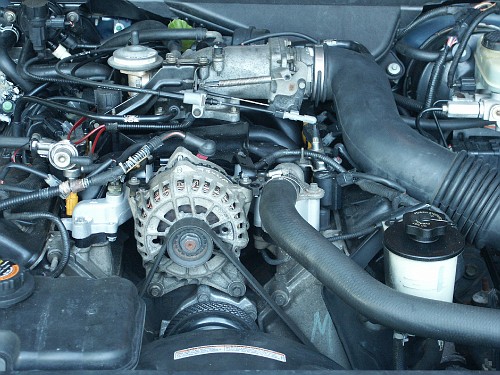
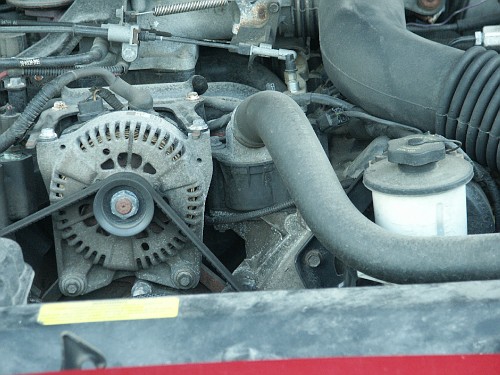
A closeup of the injector well
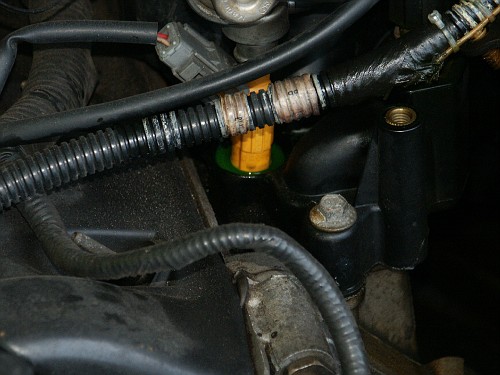
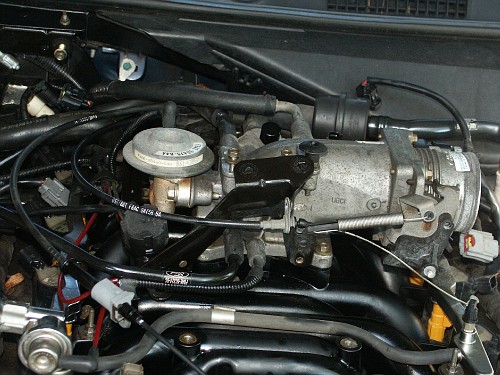
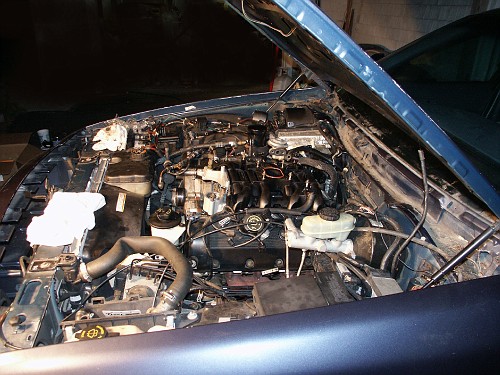
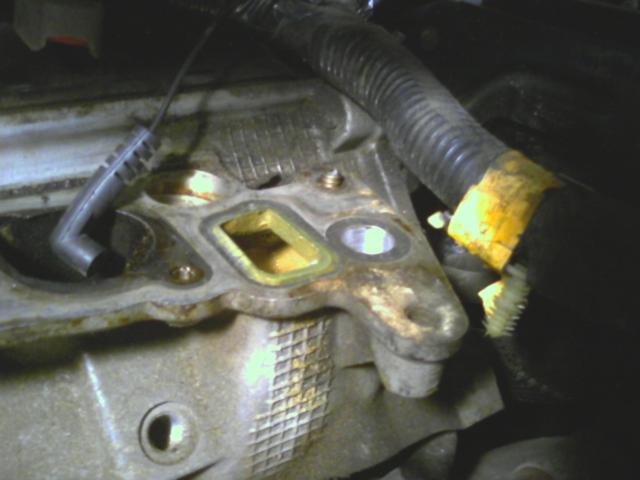
A closeup of the green colored alternator bracket bolt
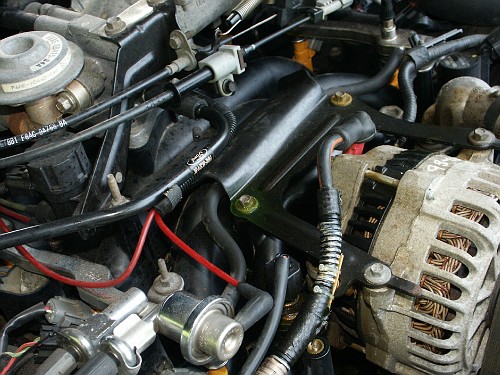
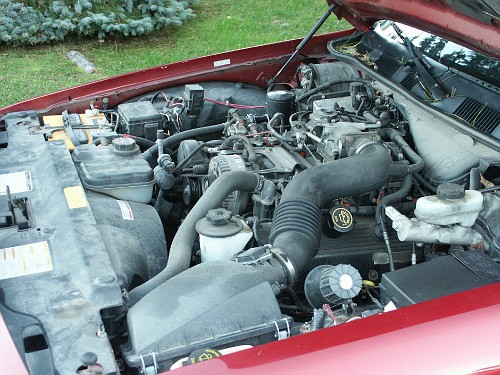
Interestingly, the intake manifold didn't leak visibly when the engine was idling in the driveway. There was definetly a leak somewhere when the system was under loftier pressure though.
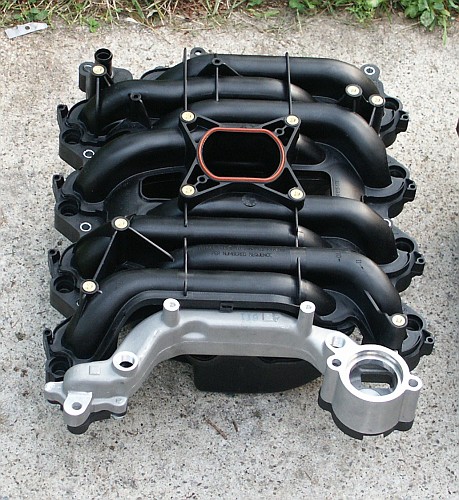
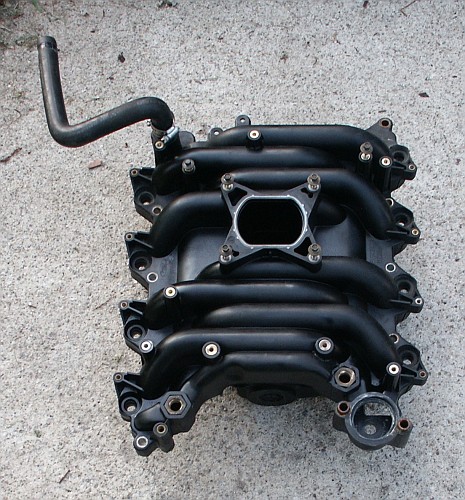
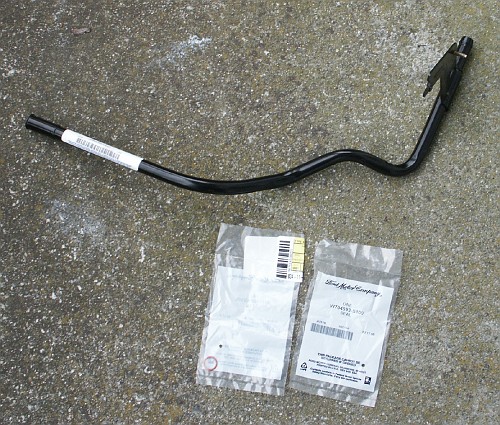
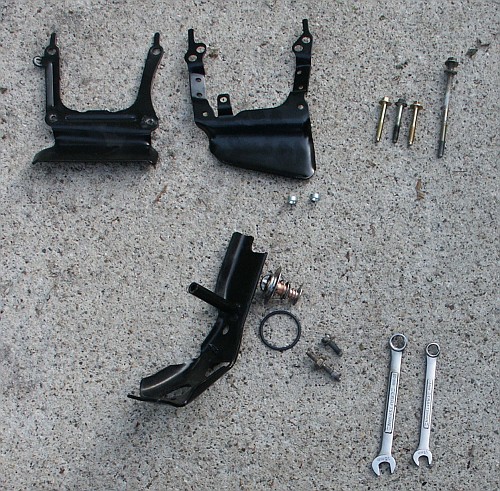
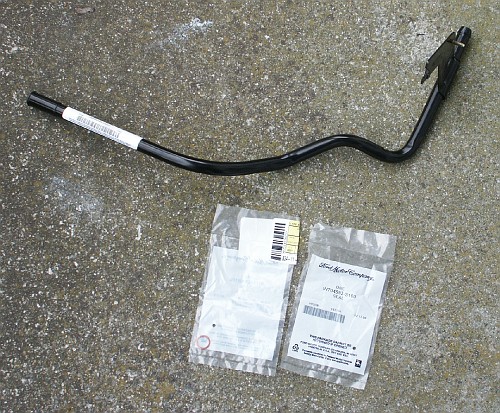
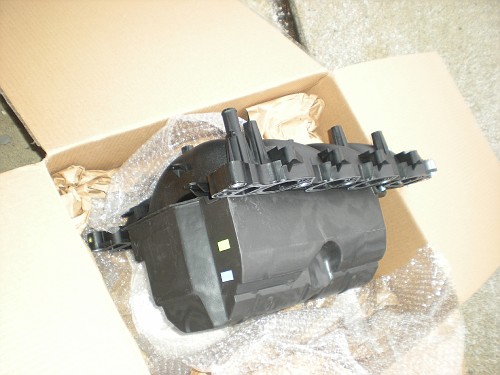
Then it's part's acquisition time. Hither's our replacement intake manifold, part of the aftermarket dorman 138004 kit.
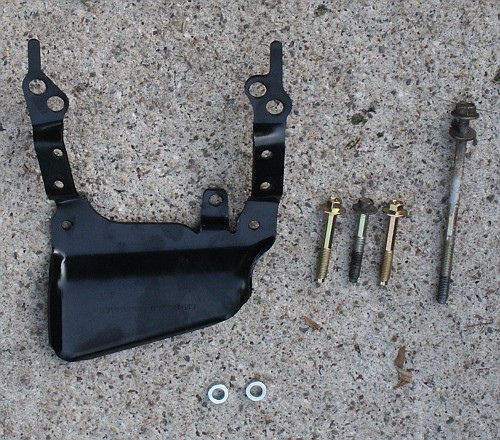
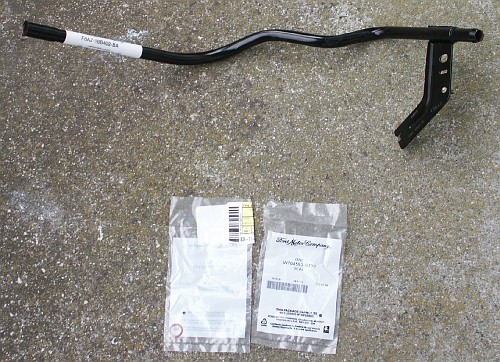
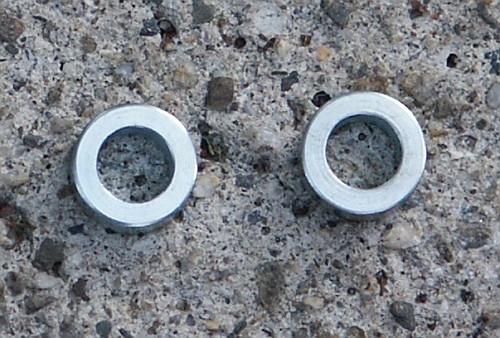
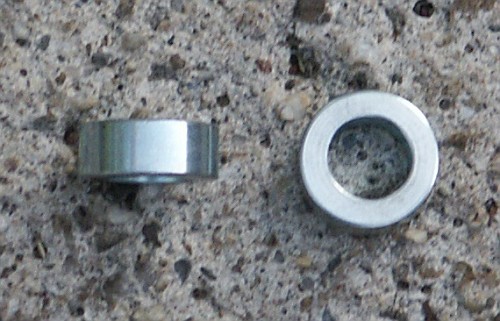
The universal alternator bracket and the two thermostat commodities spacers
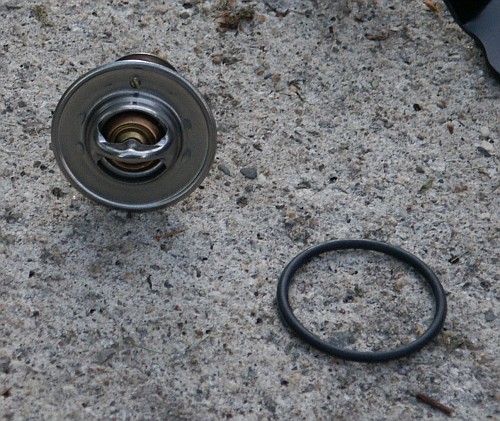
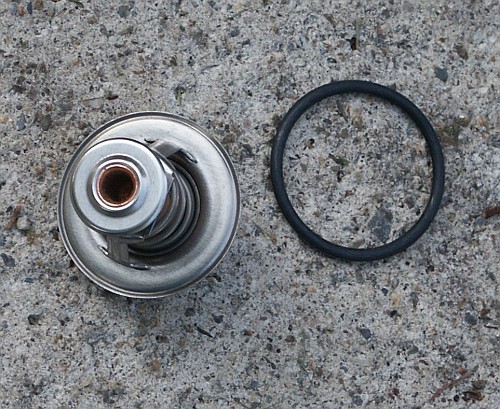
The thermostat and o-ring seal
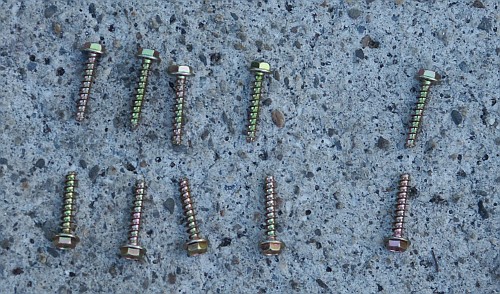
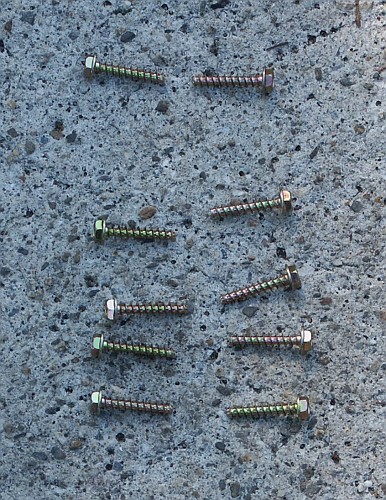
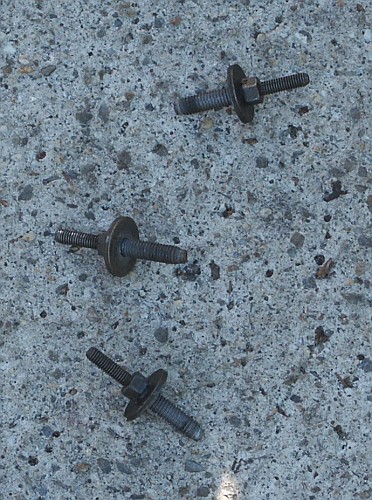
Here are the self borer bolts that were included to hold down the ignition coils and throttle cablevision bracket. The oem ford unit used machine screws with brass inserts in the intake manifold instead.
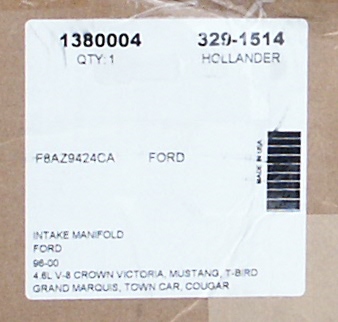
The part number from the box. Do annotation that this is an early revision of the dorman intake manifold kit purchased within a few months of when dorman first offered this kit in 2005. The intake manifold kit currently offered by dorman for the 96-00 crownvics has a part # of 615-178.
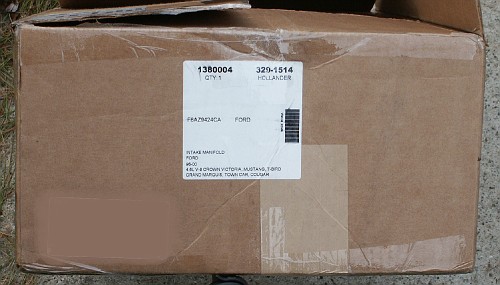
Dorman: 1380004
Hollander: 329-1514
Ford: F8AZ-9424-CA
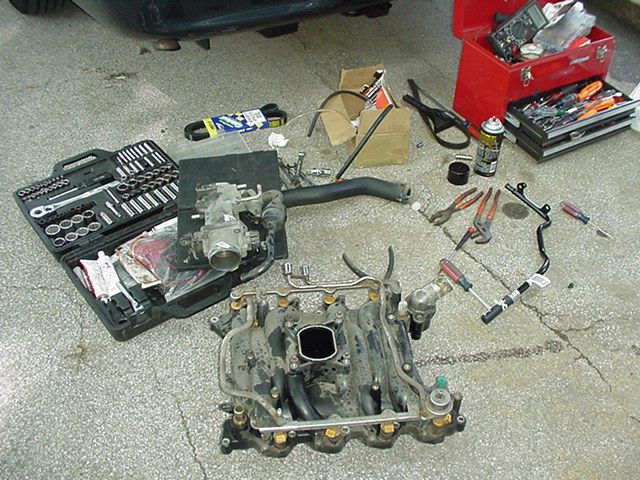
Now that the needed parts have been acquired, the installation can begin.
The first step is to disconnect the negative terminal of the bombardment to prevent damage to electric harnesses or electrical fires during our project.
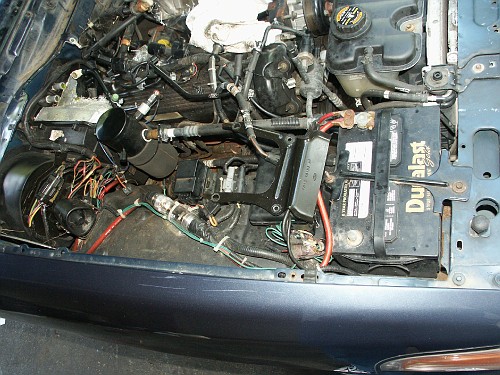
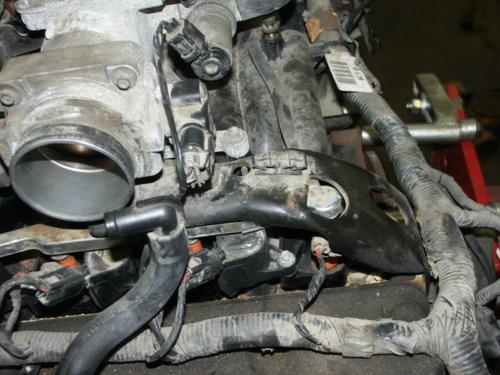
Disconnect accelerator linkage
Remove alternator, cruise command cable, a couple vacuum harnesses, air intake zip tube and diverse bracketry.
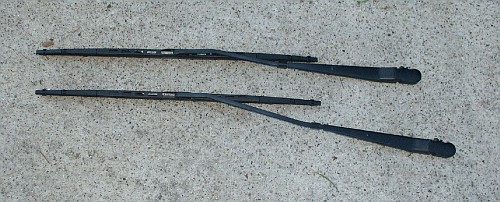
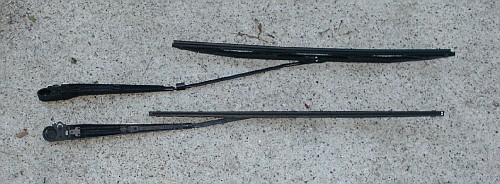
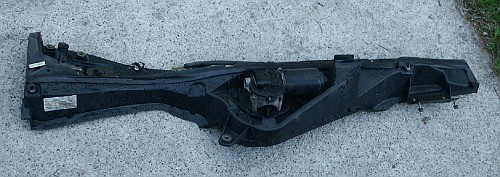
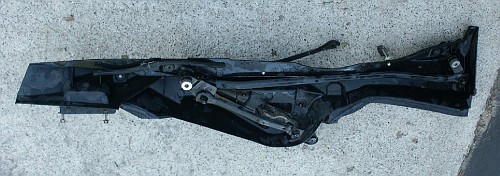
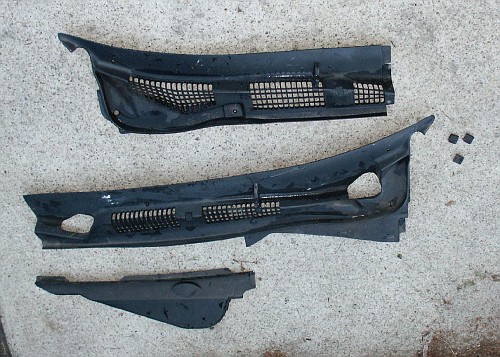
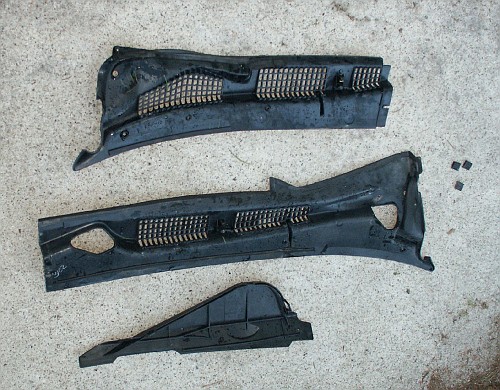
Remove the remains of windshield wiper cowl
Remove throttle body and air intake plenum
Start disconnecting diverse electrical harnesses
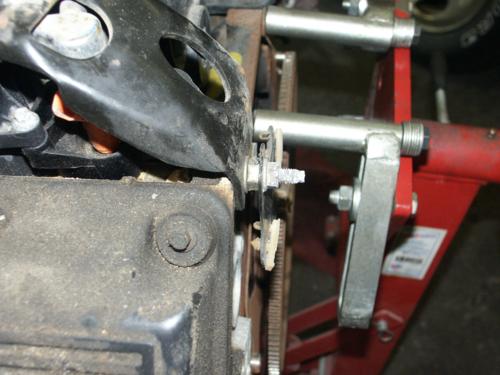
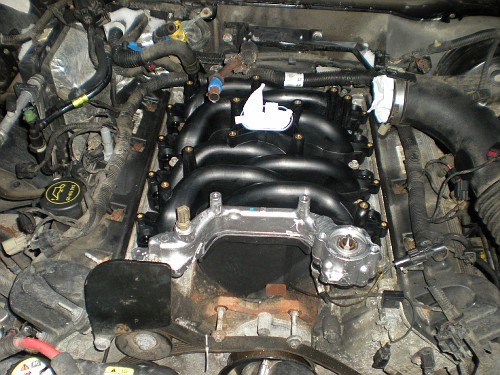
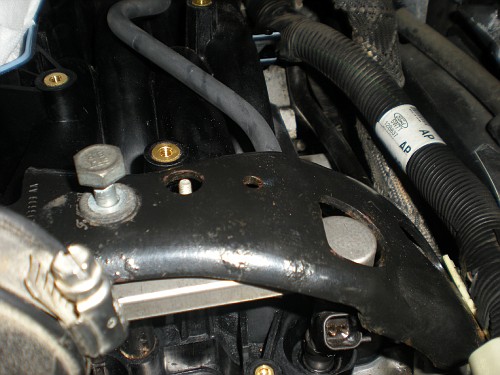
Deal with the crash bracket that protects the rear portion of the driver's side fuel rail
Now that the crash subclass is out of the manner, the fuel rail can exist removed.

Some people without the proper fuel line spring lock tools have reported that you can unbolt the fuel rail from the intake manifold and move it to an unused expanse of the engine bay for this project because the fuel line flex hoses allow a great deal of movement. Just y'all must be careful not to harm the frail exposed portion of the fuel injectors if you choose to leave the fuel rail assembly laying loose in the engine bay during your project.
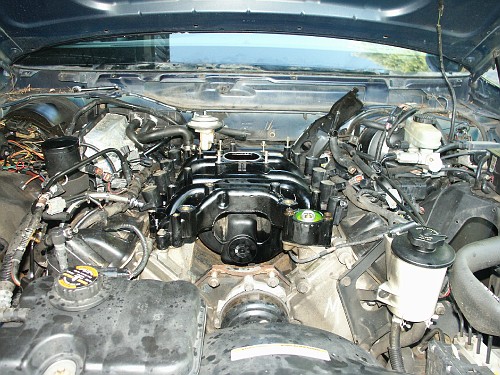
At present remove the ignition coils and the intake manifold itself
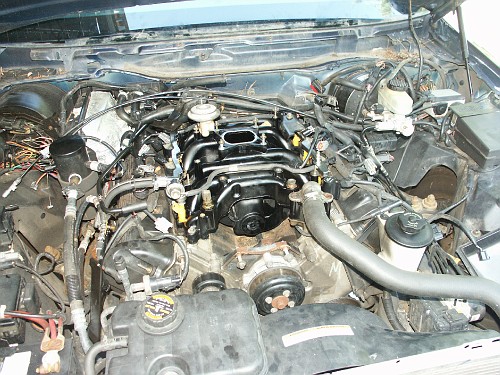
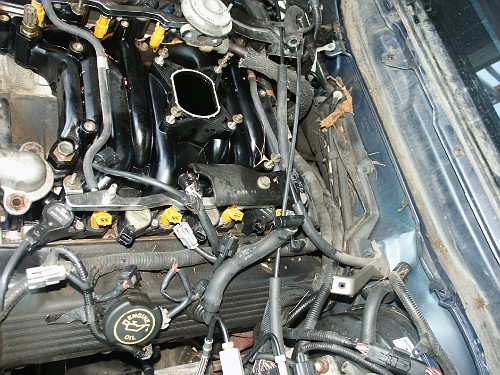
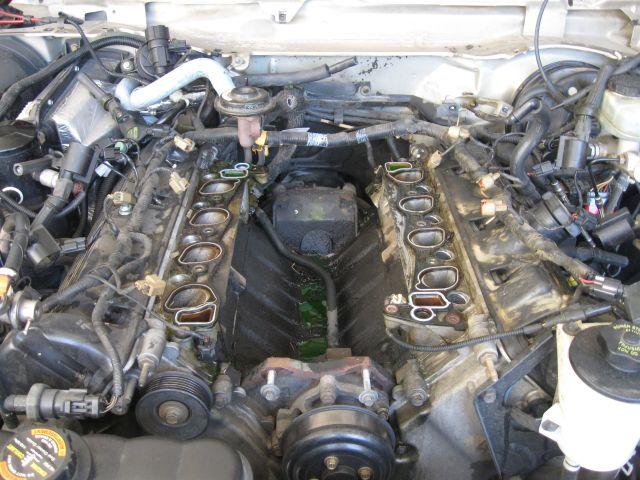
Here's the intake valley with the manifold removed simply gaskets nonetheless present. That black metal tube running through the middle of the valley returns engine coolant from the heater cadre to the back of the water pump.
The EGR valve->Tube Nut was stubborn in this case, then the nut was left installed and the valve removed from the plenum instead.
The sensor with the white connector mounted in the aluminum casting on the commuter's side cylinder head is for the fail safe cooling. This sensor is installed directly into the aluminum casting and does not directly touch engine coolant or oil, instead information technology monitors the raw temperature of the aluminum caput casting. This is a new feature for the 1998 model yr, 1997 and prior crownvics will not accept this sensor.
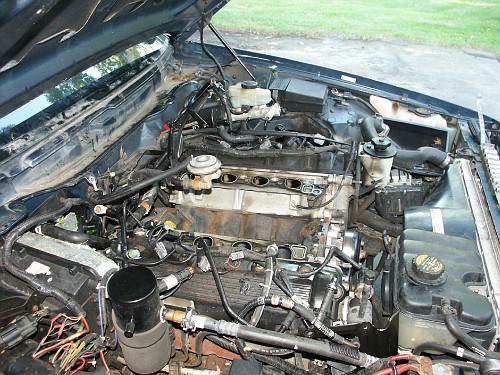
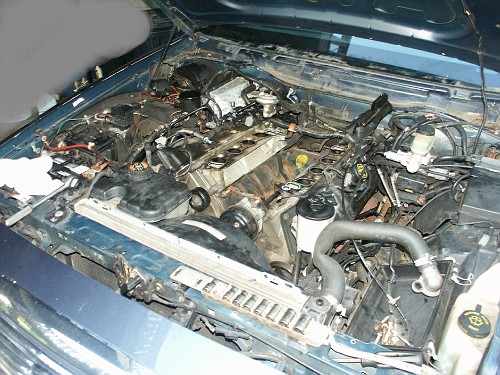
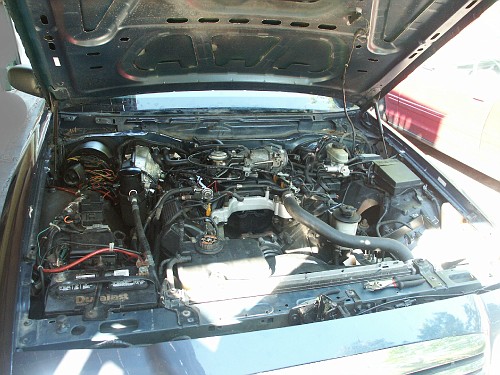
Time for a work break, and then the hood is airtight.
Find how much infinite there is in between the windshield and hood without the windshield wiper cowl installed?
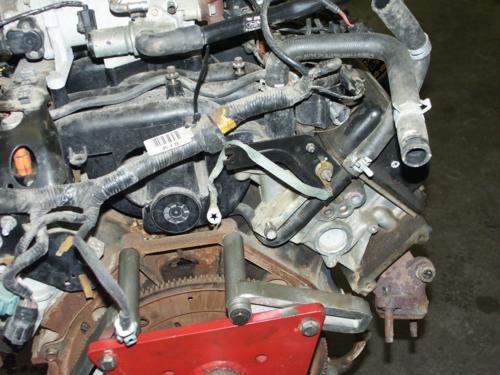
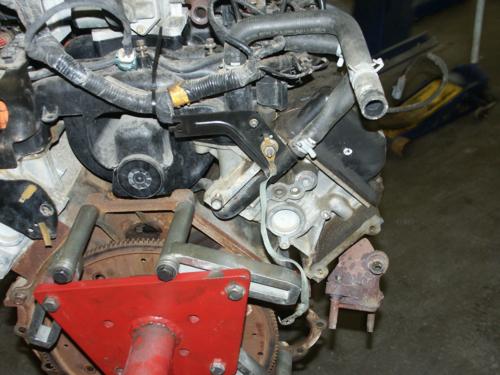
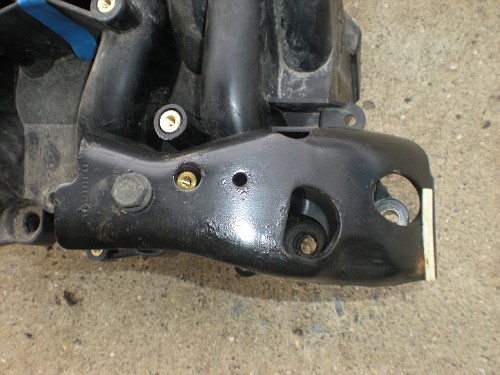
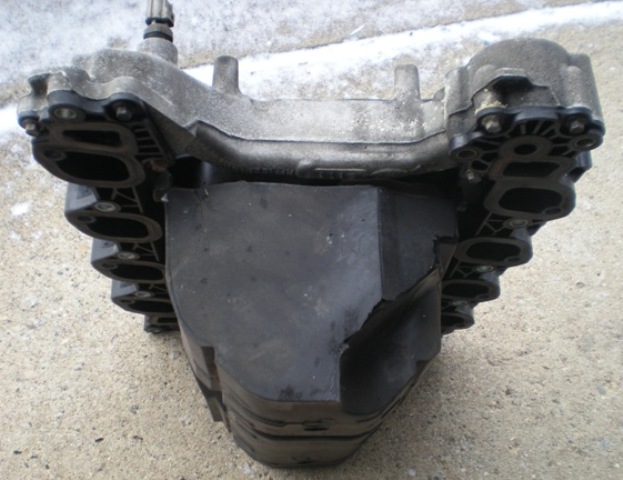
Here is an engine from a dissimilar crownvic removed from the car showing back of the engine with the crash bracket fastened. This surface area of the engine is normally very difficult to photograph due to the firewall being in the style.
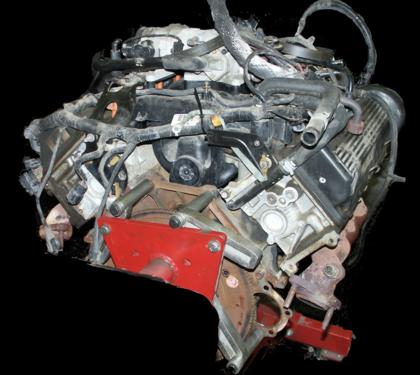
With the wiring moved out of the way
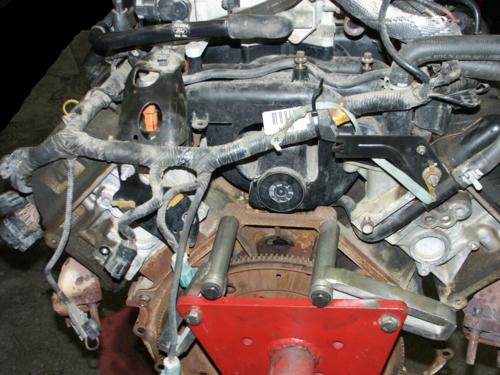
The engine & crash bracket viewed from the side
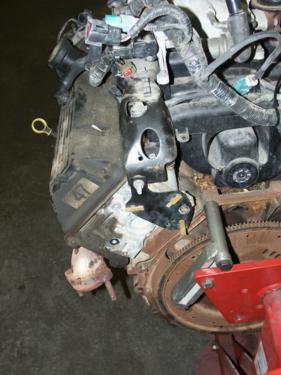
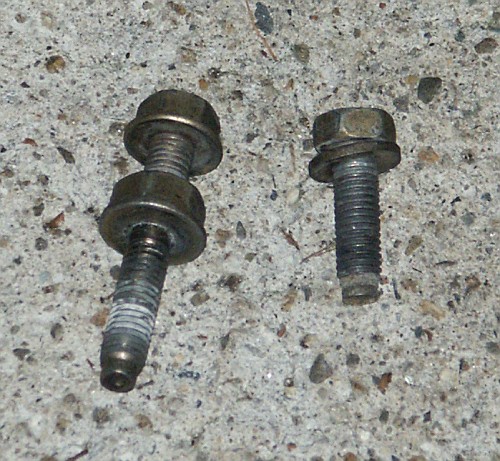
The bottom crash subclass retainers from viewed from the side. To remove the crash subclass, you first remove the nut for the wiring subclass. And so slide the wiring bracket out of the manner so that you lot can remove the commodities/stud that holds the crash bracket to the engine cylinder head.
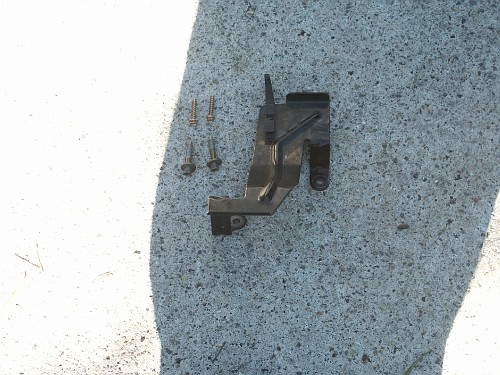
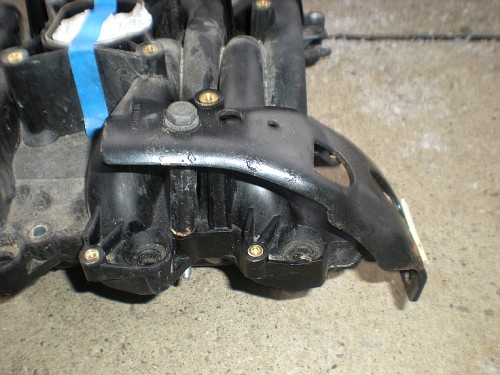
Here's the crash bracket and information technology'due south mounting fasteners removed from the engine. Note that this bracket will not be present in 1997 and before crownvics.
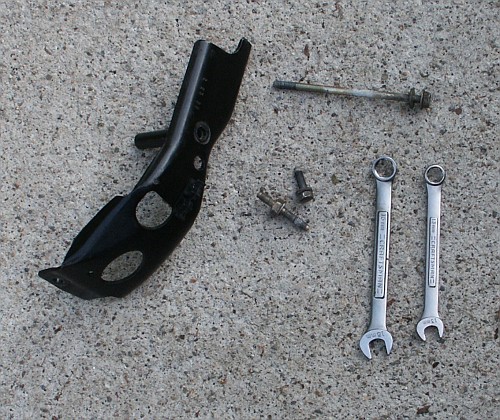
Ocassionally, you'll find a 1998+ crownvic that has had this bracket chopped in two parts using an angle grinder. This hack saves mechanics a little fourth dimension during intake manifold replacement, but it does brand the auto more than probable to have a fuel line burn down during a high energy frontal crash.
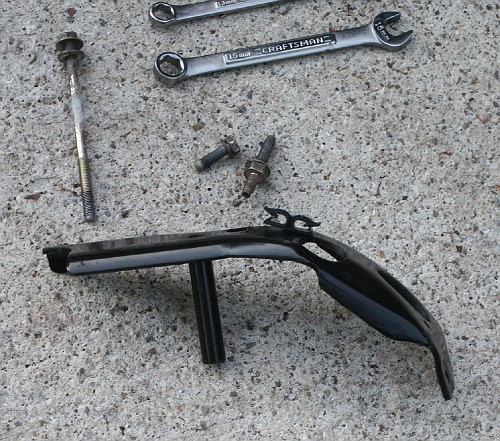
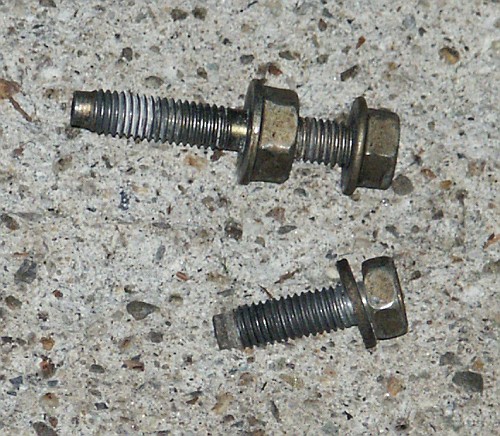
Sometimes, you'll likewise find this bracket missing from a 1998+ crownvic. And instead of having that really long bolt with a large long spacer subclass underneath, a regular intake manifold hold-downwardly bolt is installed. All the 1998+ cars have this bracket factory installed, merely mechanics sometimes "decontent" the part to brand future engine work easier.

At that place was a possibility of some rain overnight, so the cylinder head ports were covered using some saran wrap from the kitchen which was weighted down with the ignition coils and some rags.
The covering turned out to be an unneeded precaution in this case, merely it would have been a bad affair if lots of water poured into the engine from an overnight rain.
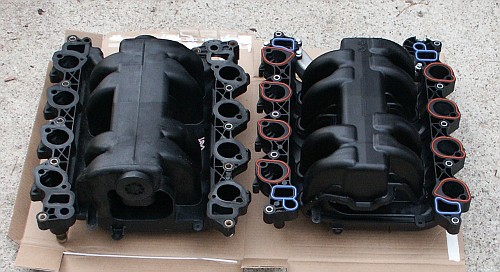
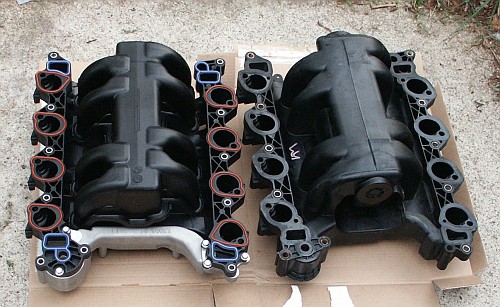
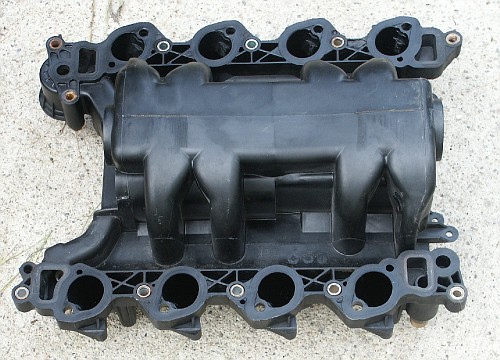
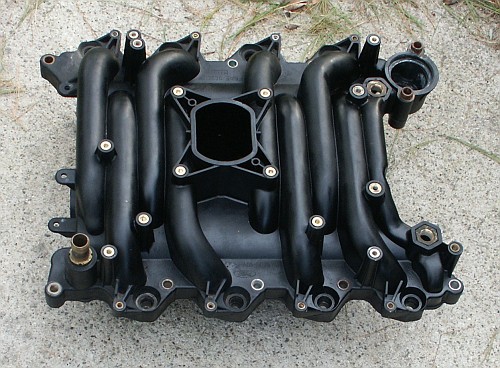
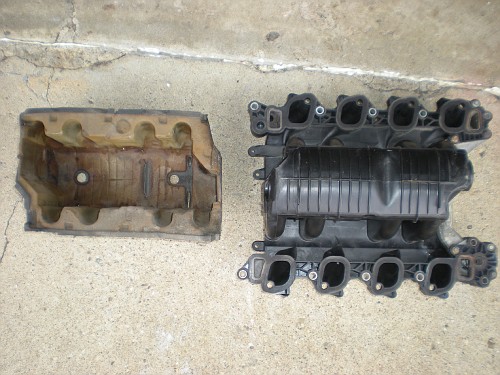
Lets take a look at the old oem ford intake manifold next to to the aftermarket dorman one. Later oem ford units accept the aluminum front coolant crossover too, but this oem ford unit is an early service unit manufactured in 2000.
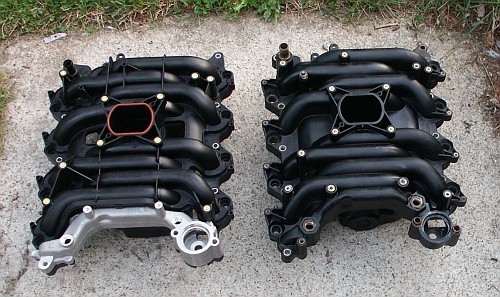
Observe the integrated throttle body gasket on the dorman unit of measurement?
Also note that there are no brass inserts to concur the ignition coils downward. Cocky tapping sheet metal screws are used instead. Not a big deal as these fasteners are essentially nether no load and you probably wouldn't come across whatever bug running your crownvic without any ignition ringlet fasteners at all.
The dorman intake manifold has the intake manifold->cylinder caput commodities torque sequence cast straight into the plastic. There are too a couple rectangular openings besides where throttle trunk mounts that open directly into the intake valley beneath.
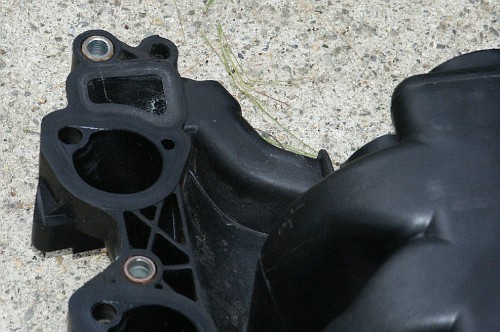
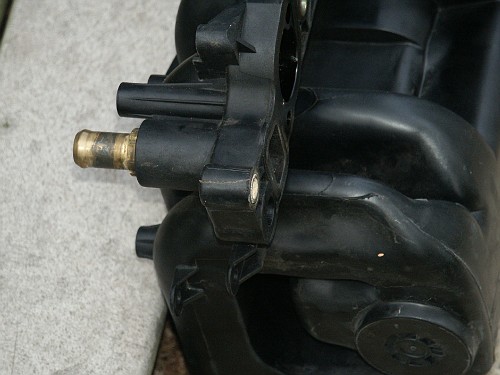
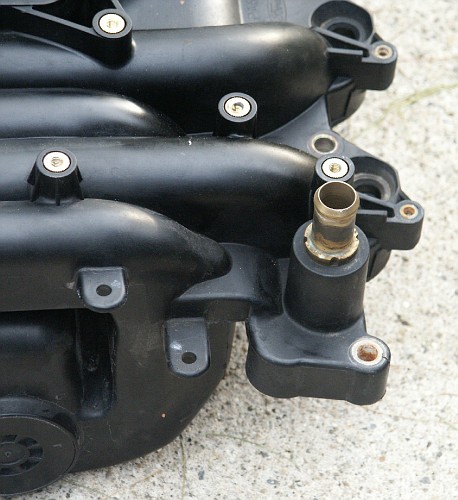
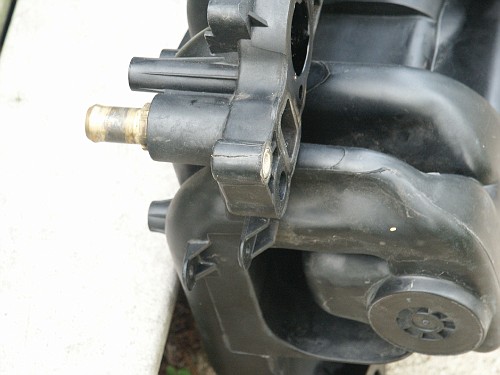
Here'south a closeup of the heater hose connectedness port. The oem ford unit uses a brass insert.
The dorman unit is a plastic resin heater core connection port instead. Exist conscientious non to over torque the hose clamps to preclude harm. Practice note that some oem ford crownvic intake manifolds also use a plastic resin heater connection tube too.
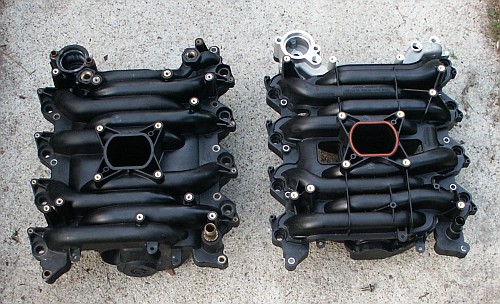
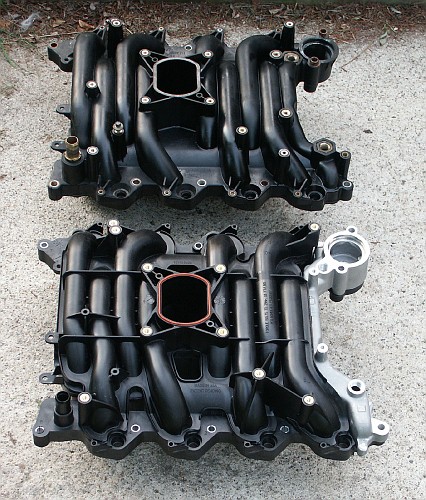
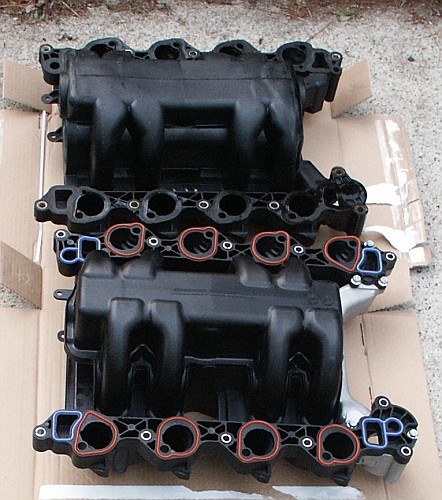
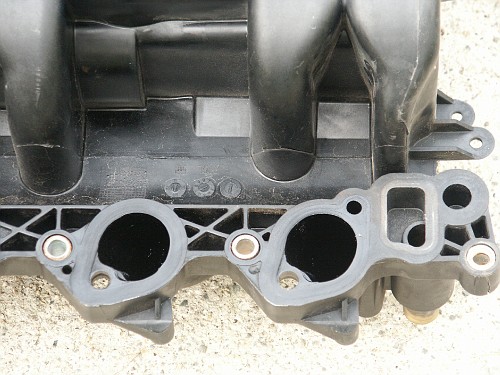
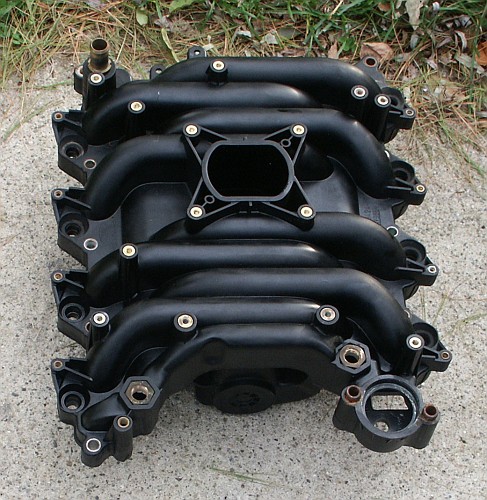
Here's the other side of the intake manifolds that would normally be connected to the cylinder head ports
Find the integrated orange and blue colored gaskets on the dorman intake manifold?
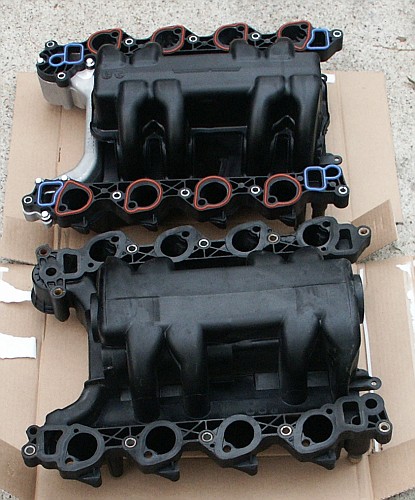
Blue Gasket = Coolant Passage
Orangish Gasket = Air Passage
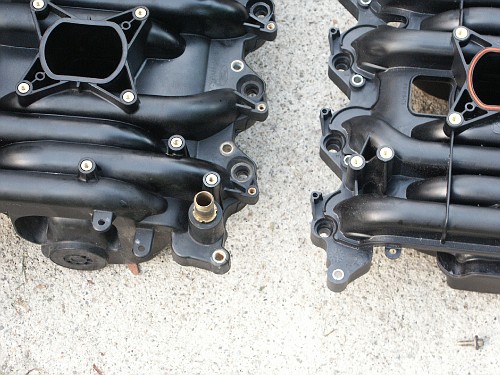
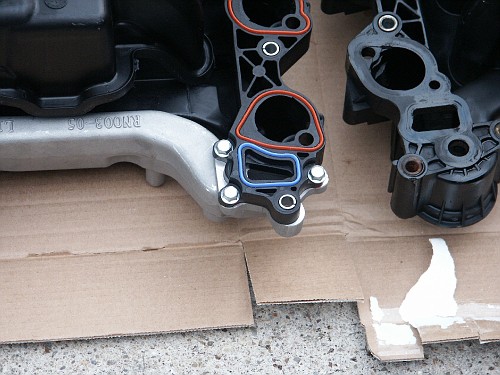
Hither's a closeup of where the aluminum coolant crossover meets that nylon resin portion of the intake manifold.
In that location appears to be a mutual misconception amid the general public that the front coolant crossover on their crownvic is solid metal from one cylinder head connection betoken to the other. This is definetly not the case with either the aftermarket dorman intake manifold or the later oem ford intake manifold that has the aluminum front end crossover. There is a peice of plastic wedged in between the head connexion surface on both intakes.
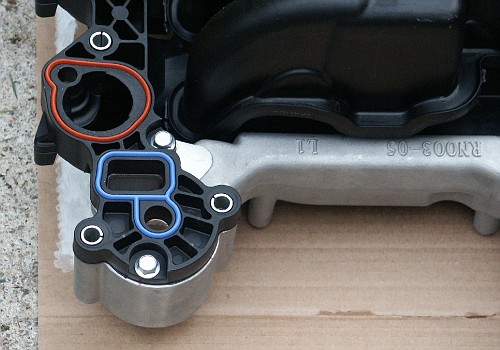
Hither's a closeup of the other side of the intake where the thermostat would commonly be mounted. Do note that the waterneck bolt holes in the intake manifold are unthreaded and the really long coolant gooseneck bolts thread into the cylinder caput beneath.
Around the time that I was replacing the intake manifold on this motorcar, there were a bunch of failures of the under intake manifold hose reported on crown victoria internet discussion forums. Since I did not find it desirable to have to remove the newly installed dorman intake manifold anytime soon, I besides elected to replace under intake heater cadre return too.
Also dorsum in 2005, replacement gaskets were not avaliable for the dorman intake manifold. If you wanted new gaskets, you needed to buy a new intake manifold kit. It's now 2022 and the dorman intake manifold gaskets are avaliable aftermarket and parts avaliablity is no longer a concern.
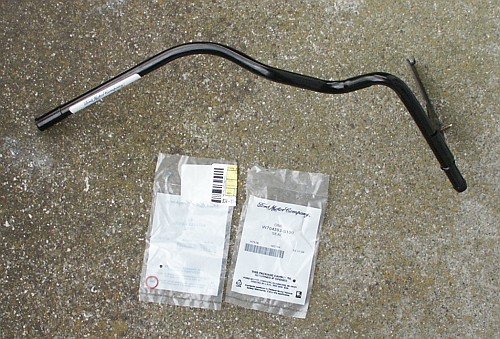
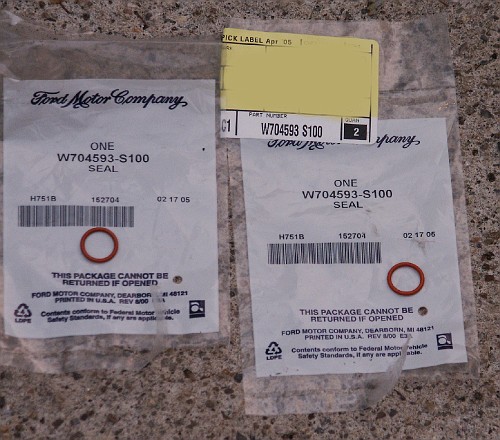
2 replacement o-rings were too needed
F8AZ-18B402-BA
W704593-S100
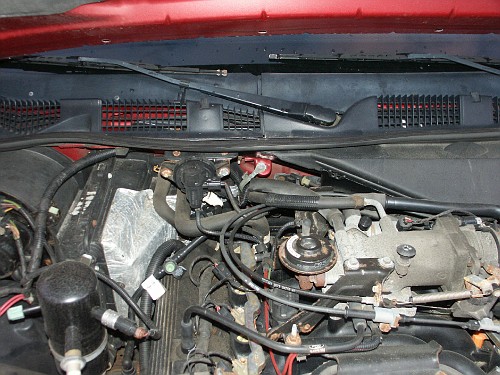
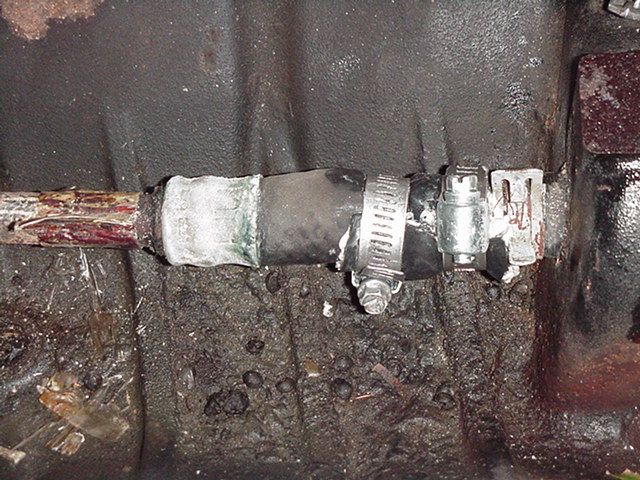
To remove the heater cadre tube, you first remove the heater hose from the render tube and and then remove the bolt that holds the assembly to the cylinder head. Here is a picture of a 2000 crownvic engine from the back showing how the heater core tube mounts in the 1996-2000 cars. Practise note that in that location is normally an egr dpfe sensor mounted to this subclass too.
The former heater core return tube was difficult to remove. It did non just slide off the waterpump nipple similar the shop manual implied. I ended up cutting the old return tube with a hacksaw and the spinning the tube off with a pair of visegrip pliers instead.

Here's the return tube nipple after being cleaned upwardly with some 600 dust sand newspaper and having the two new o-rings installed

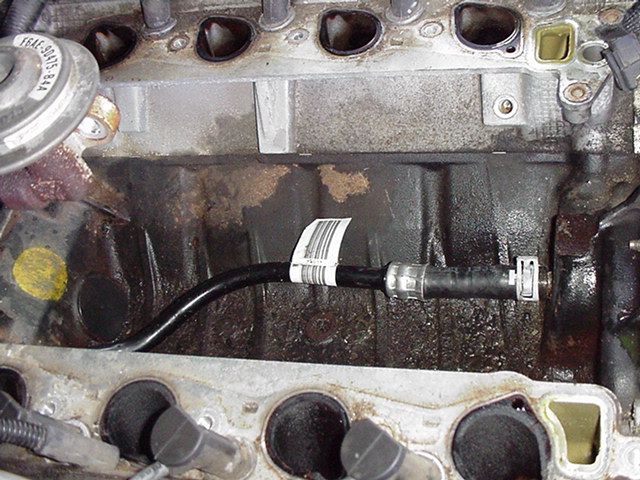
Here's the empty intake valley. If this hose develops a leak, coolant will flow out the hole in the rear which then will baste down through the manual bellhousing area. Many mechanics that aren't familar with crownvics will misdiagnose a leaky under intake hose every bit failed freeze cadre plugs.
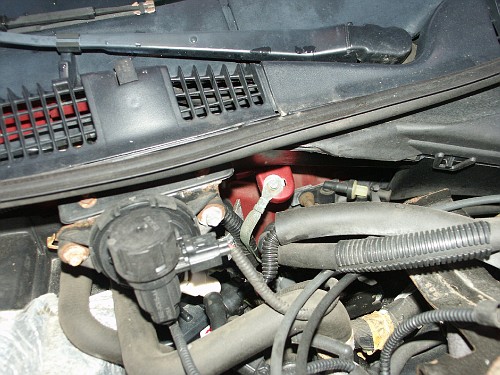
Before intalling the new heater core return tube, lubricate the o-ring seals on the waterpump nipple with some antifreeze. And make sure to reinstall the braided ground strap connection prior to installing the bracket mounting bolt on the dorsum of the engine cylinder head.
The other cease of this ground strap attaches to a metal tab on your crownvic's firewall higher up the heater core return tube bracket
The cylinder head sealing surfaces volition demand to be cleaned up some before the new intake manifold tin can exist installed. For this task, some carburetor cleaner and razor blades worked well for getting those stubborn carbon desposits and other grime removed. While the razor blades were out, the remnants of the old egr gasket were also cleaned off the egr valve and intake plenum.
Here's a test fit of the new intake manifold. Note, coolant temperature sensors have been loosely installed. And many mounting fasteners are inserted finger tight to ensure that all mounting fasteners volition be installed in their proper locations

Hither'southward a closeup motion picture of the failsafe cooling sensor that was mentioned earlier
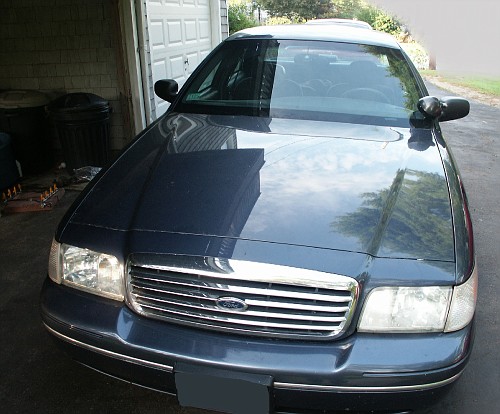
Here'due south our projection car after sitting outside for the dark
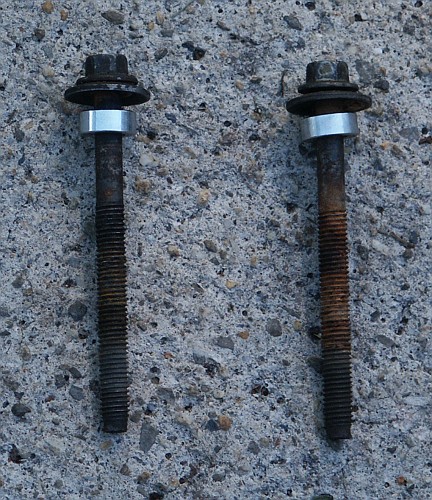
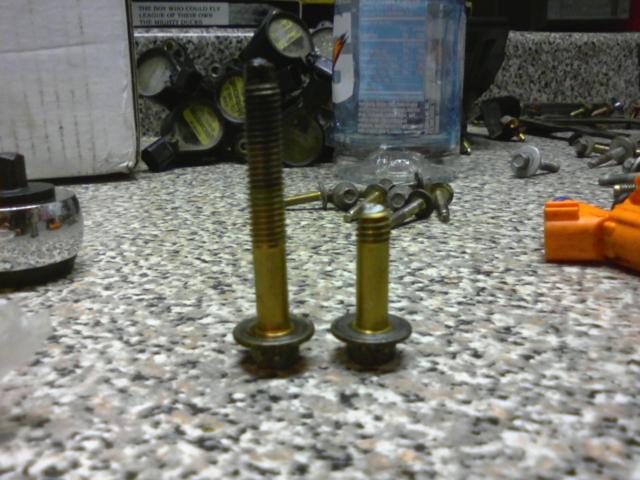
Here are the really long thermostat bolts. These pass through the intake manifold and thread into the cylinder head below. The intake manifold does not comprise any threads for these bolts to thread into, instead the intake manifold is wedged in between the commodities heads and the cylinder caput beneath.
For removing these bolts, a pneumatic air impact wrench with the pressure regulator set really low works good. If you encounter stubborn bolts don't just stick a long breaker bar and button with all your muscles. You are likely to snap the bolt in two with this method and then have the frustrating chore of removing the broken bolt remnants.
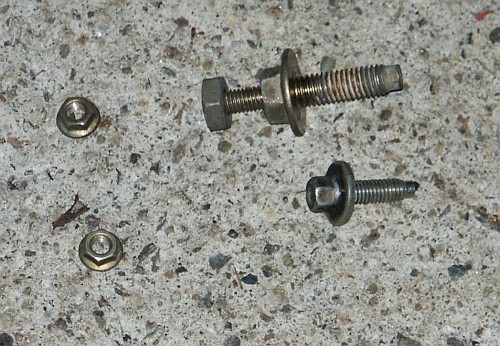
Instead of replacing the waterneck gooseneck like the oem ford kit does, the aftermarket dorman kit contains two aluminum spacers.
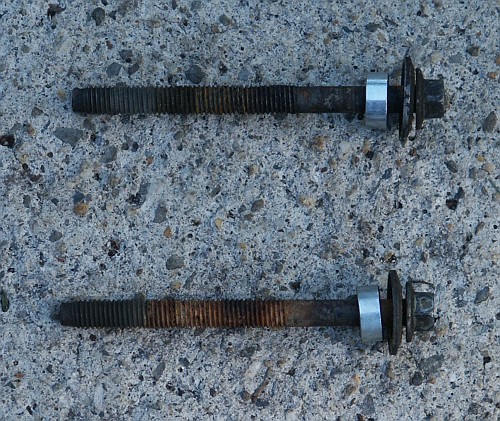
Here are the two really long thermostat gooseneck bolts sitting on peak of the intake manifold for size comparison.
As mentioned previously, use a pneumatic air impact wrench with low air pressure to loosen stubborn thermostat bolts. If y'all put lots of strength on the stubborn thermostat bolt head using a long hand ratchet, you're probable to snap the commodities in two like BlueFusion did.
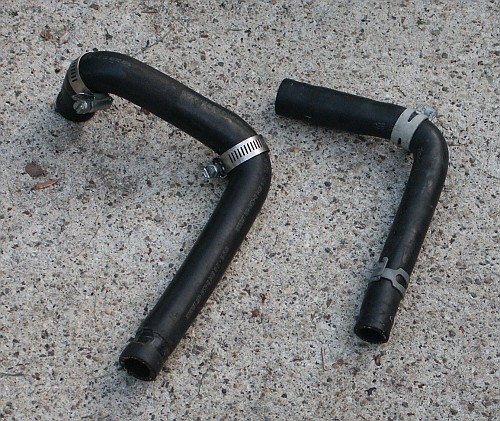
I removed both heater core hoses since both the intake manifold and under intake heater core tube were being replaced
Hither is the throttle cablevision bracket next to the oem machine screw & aftermarket dorman cocky tapping bolts
Before inserting the waterneck, brand sure that you have the o-ring seal in place. Likewise double cheque that y'all did not accidentally install the thermostat upside downward. Hither is a moving-picture show of a different crownvic showing the proper orientation for these parts. The o-ring goes on top of the thermostat non under information technology.
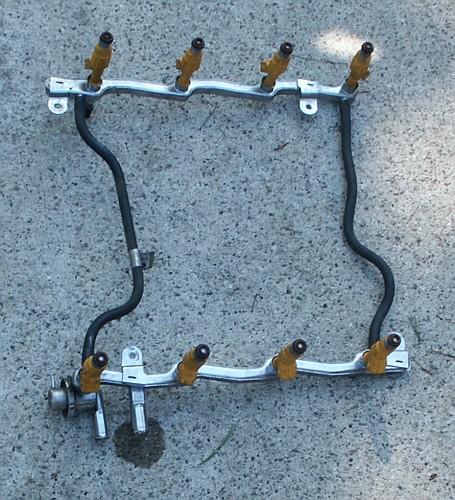
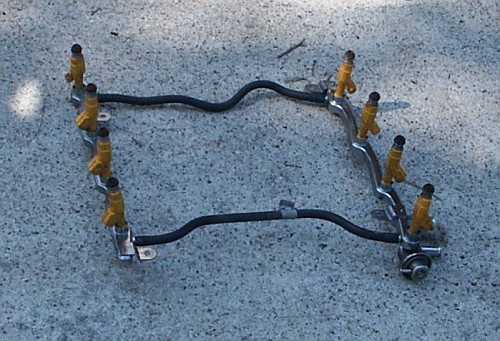
The fuel track, air intake plenum, and ignition coils reinstalled
A closeup movie of the fuel rail flex hose spring locks. Do annotation that in 1996-1997 crownvics, the fuel runway flex hoses are located on the commuter's side of the car instead of the passenger'due south side.
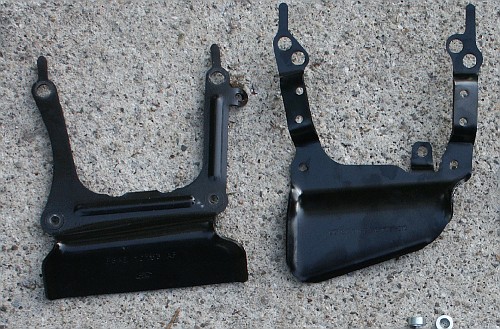
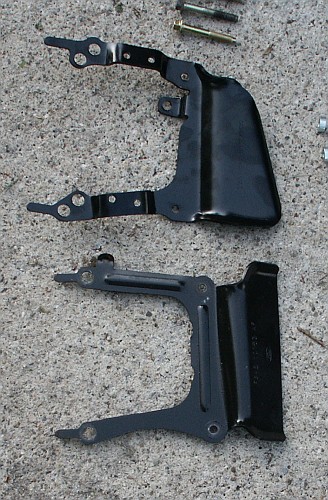
Here's the oem alternator bracket adjacent to the aftermarket dorman one
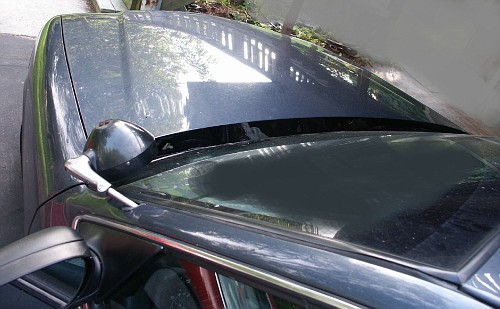
The air intake zip tube, airbox chapeau, alternator, and most of the remaining components have now been installed. My car'due south engine volition exist ready to run after the battery is reconnected

Windshield wipers would exist a nice addition to my ride though

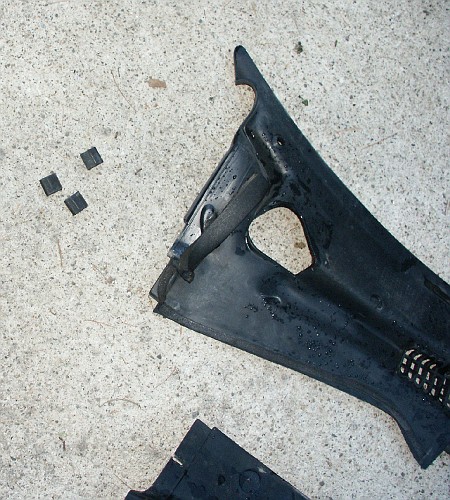
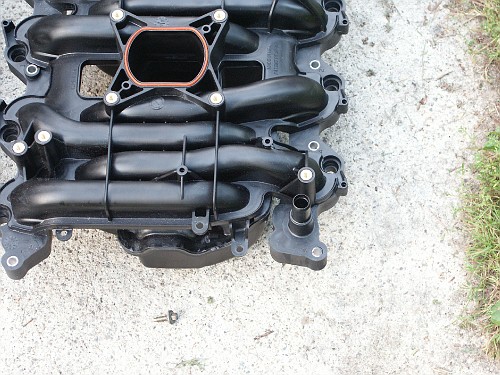
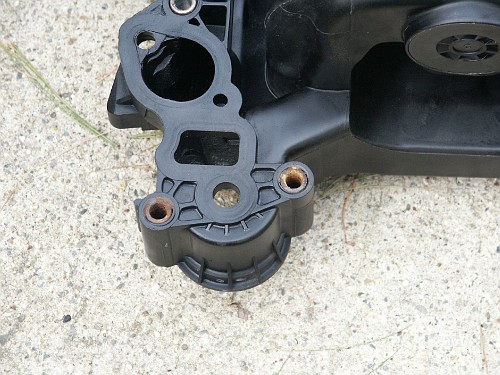
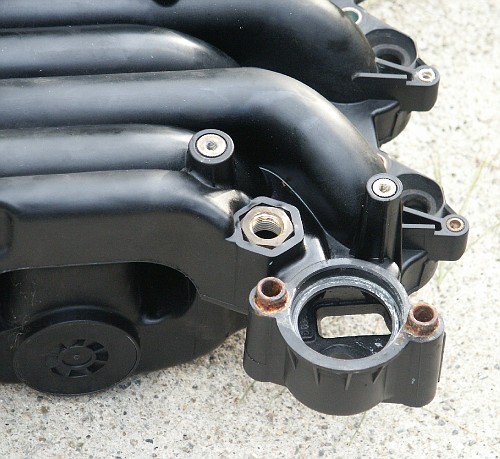
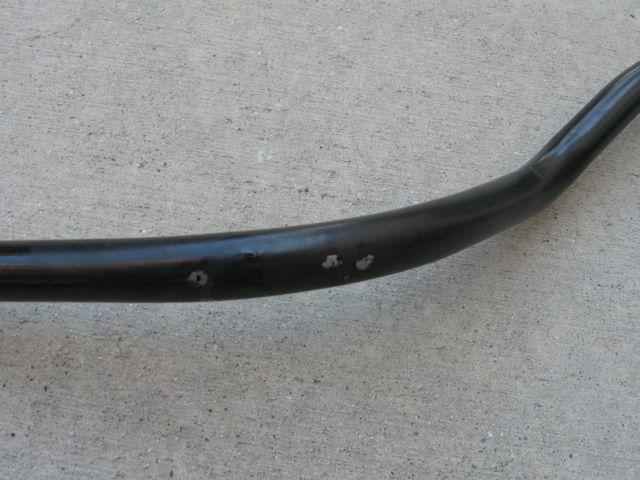
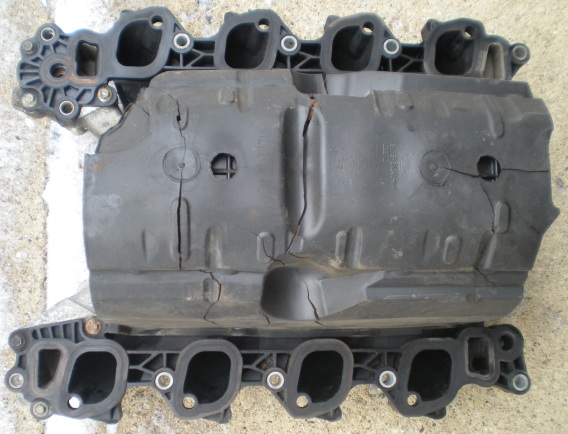
Now that the car is in running condition again, allow's take a closer look at the old intake manifold that failed
This is a closeup moving picture of the area on the front of the intake manifold that leaked coolant. If you expect closely, y'all can meet a thin white line where the crevice is located.

Here's a closeup of the surface area where the heater cadre hose would connect. This expanse also had an intermittent leak when the coolant system was under high pressure level. This leak caused coolant to squirt out which would then collect in the #4 spark plug well and brusque out the #4 ignition coil causing a bad misfire.
Although at that place were a handful of problems with this manifold, the brass heater hose insert still sealed good to the intake manifold.
Here is a closeup moving picture of the expanse where the thermostat would be located. Although this area wasn't leaking coolant yet, there are some cracks starting to develop in this area.
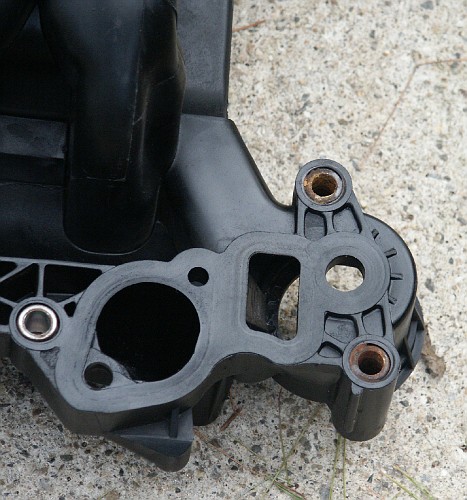
Hither'due south the intake manifold from the top
On the front coolant passage are two metal inserts for mounting coolant temperature sensors. The insert on the right virtually the thermostat surface area started to spin in the plastic casting when the plug was removed.
A look at heater core return tubes from other model year crownvics. The 1992-1995 & 1996-1997 render tube assemblies
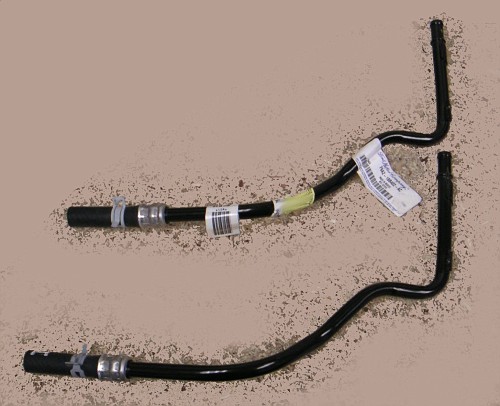
A closeup of the flex hose sections of the return tubes. If the metal portion of the tube is in skillful condition, yous can cut off the metal crimp and install regular heater hose with a worm bulldoze clamp here.
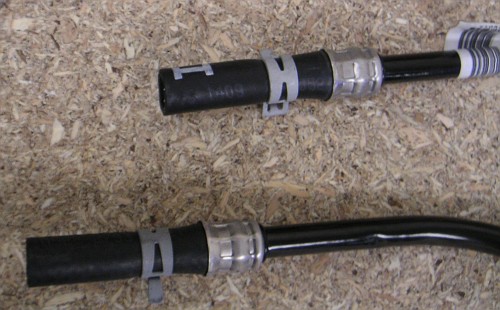
The other terminate of the tube associates where the heater core hose would connect and the dpfe sensor be mounted.
Here's a 1996 ford crown victoria police force interceptor with the intake manifold removed to replace a leaking under intake manifold hose
Previous patches had been attempted with the intake still installed on the car, but they didn't stop the leaks
And so a new return tube was installed
The possessor of this auto was really depression on coin, so the original intake manifold was reinstalled after replacing the nether intake heater core hose. This repair worked passably for a little chip, just a few months later the intake manifold itself developed a leak and had to be replaced. This resulted in the intake manifold being removed from the machine twice.
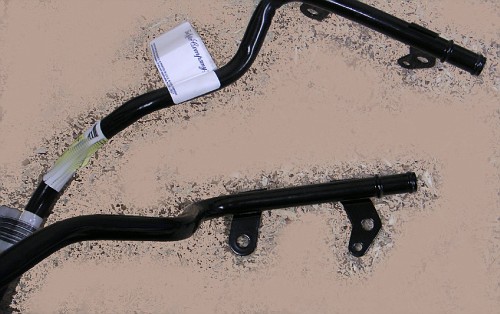
The solid metal return tube used in the 1998-2000 crownvics. You tin install this tube into a 1996-1997 crownvic if y'all remove the waterpump, pound out the onetime heater core tube, and install a 1998+ waterpump tube. Only in most instances, you'll probably desire to stay with the original manner tube that your motorcar came with.
The solid metal heater core render tubes used in the 1998+ crownvics are more durable than the ones with the safety flex hose section used in the 1992-1997 crownvics, but they yet do ocassionally neglect as metro21 found out on his 2000 crownvic p71
The engine intake valley is not supposed to be filled with antifreeze similar this

And there is not supposed to be a hole in the tube here either
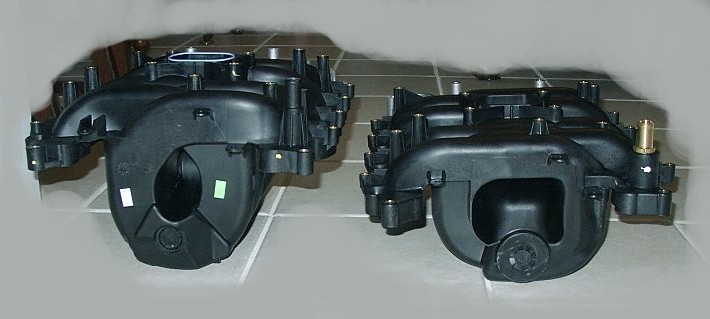
PI vs NPI intake ports
Starting in the 2001 model yr, crown victorias recieved PI "Performance Improved" ports on the intake manifold and cylinder head. These catamenia a little amend than the NPI "Teardrop" ports used in the 2000 and earlier crownvics. Exercise note the acronyms used here:
PI = "Functioning Improved"
NPI = "Non- Performance Improved"
PI does Non equate to police interceptor in this context.
On the left is a PI inake manifold for 01-02 crownvics. On the correct is an NPI intake manifold for 96-00 crownvics.
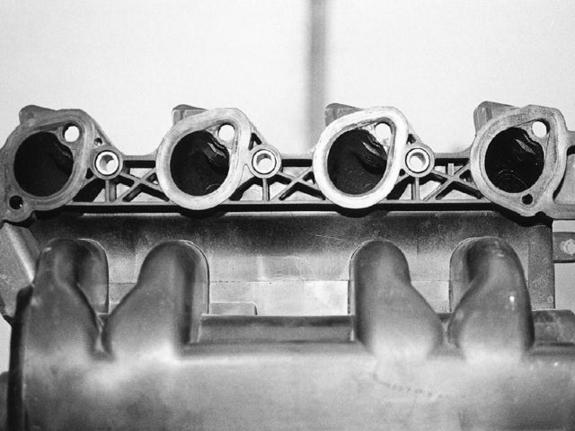
Here is a closeup of the NPI teardrop ports that you'll find on 96-00 crownvics
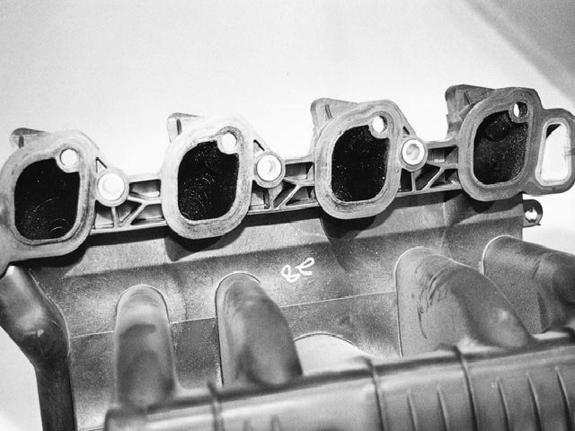
And a closeup of the PI ports that yous'll observe on 2001 and later crownvics.
On the left is a cylinder head from an NPI engine. On the right is 1 from a PI engine.

Some crownvic owners have found that they can utilise a 2001+ intake manifold on their 1996-2000 vehicles if they bandy in the later style heater cadre return tube and use some rtv effectually the seal port surfaces. This is reported to increase airflow & horsepower to some extent. But be warned that some crownvic owners have concluded upward with difficult to diagnose driveability problems later on this bandy likewise.
2005 Crown Victoria Intake Swap Pictures
Below are some pictures taken by DetroitP71 on world wide web.crownvic.internet during an intake manifold projection on his 2005 crown victoria police interceptor.
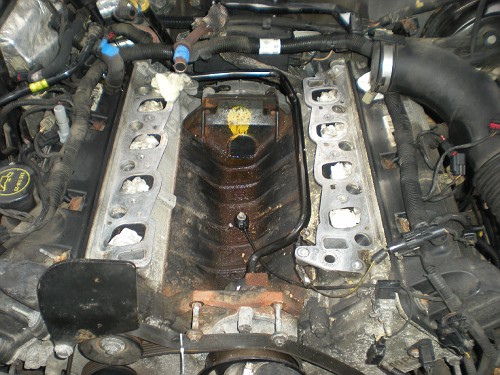
Hither is the intake manifold valley. In that location are some differences to note in the valley versus the 1998 police interceptor pictured above:
-The heater core return tube runs towards the driver's side of the valley instead of through the center
-The intake manifold ports are PI rather than NPI teardrop
-The engine has a knock sensor located in the center engine valley.
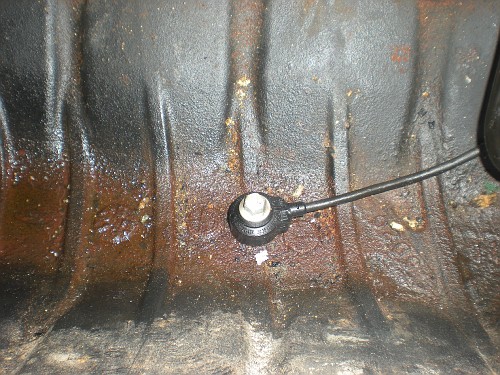
A closeup of the knock sensor which was added starting in the 2003 model year. This allows the pcm to advance the ignition timing further for more horsepower without the engine pinging/knocking.
Note that lincoln towncars recieved a knock sensor starting in the 1998 model year which is a few years earlier than the crownvic did.
A closeup of the heater core render tube curvature near the waterpump
The new intake manifold installed
This 2005 crownvic has the same cursed crash bracket setup every bit the 1998 crownvic pictured above.
The new intake manifold in it'south aircraft box
Starting in the 2003 model year, a foam insulator was introduced to lower engine racket. This peice of foam appears to take been installed as a dissonance shield when the engine knock sensor was introduced. Only you'll find many mechanics that think this office is not needed, and will omit this office when replacing an intake manifold. So if y'all purchase a used 2003+ constabulary cruiser that has had it'due south intake manifold replaced previously, don't be suprised if this function has gone missing to places unknown.
A couple pictures of the old leaking intake manifold from DetroitP71'southward 2005 crownvic. Practice note that the ford original equipment intake manifold in this car has an aluminum coolant crossover in the front. The portion of the intake that was leaking is the small plastic peice wedged in between the coolant crossover and the cylinder head below.

On the bottom of the 2003+ intake manifolds is a peice of foam. This one has a bunch of cracks in it, simply this part of the intake doesn't have whatsoever coolant or air flowing through it. It's just a noise shield to make sure that the engine knock sensor doesn't send noisy data to the powertrain command module.
One issue that I noticed soon afterwards installing the dorman intake manifold kit was that the upper radiator hose ran actually close to the alternator bracket near the waterneck gooseneck.
The oem ford intake manifold kit contains a new waterneck that angles the hose differently and a revised upper radiator hose so that this problem would not exist encountered.

This particular waterneck appears to have been used only on 1998 model twelvemonth crownvics, and if yous have a 1996-1997 or 1999-2000 crownvic you probably won't run into this clearance event with the dorman intake manifold kit.

Here'south a 2000 crownvic with a unlike waterneck for comparison

Notes:
The 1996 and later crown victorias take an intake manifold constructed of a nylon resin with hot engine coolant flowing through it. Intake manifolds on these cars are wear items that often have to be replaced during the effective life of the vehicle. If y'all purchased a "pre-endemic" 1996-2000 constabulary cruiser from sale, at that place is a good chance that your intake manifold has already been replaced. In severe police duty with lots of idling and loftier throttle awarding, intake manifolds often didn't brand it to 50k miles earlier they sprung a leak on the front end coolant crossover or almost the passenger's rear heater hose connection betoken. At that place was a customer satisfaction plan for 1996-2000 law cruiser owners to have their intake manifolds replaced for free at their local ford dealership if they expierenced coolant leaks and the vehicle was less than 7 years former. Simply this plan has long since expired considering all the afflicted vehicles are now over 7 years old. Here are a drove of documents that ford issued about the 01M02 programme: http://www.p71interceptor.com/intakemanifold/01m02 In that location is also a parts update avaliable which includes a listing of the parts within each individual intake manifold kit: http://www.p71interceptor.com/intakemanifold/01m02/tsb0222.html And here is a collection of alternator & alternator bracket office numbers: http://www.p71interceptor.com/alternator/modelnumbers Do note that the 01M02 client satisfaction program does Not apply to 2002 or later vehicles. And y'all volition have to pay out of your ain pocket for this repair unless your crownvic is new enough and has depression enough mileage to still be covered nether the ford manufactory powertrain warranty.
//////////////
The 1992-1995 crown victorias used a solid aluminum intake manifold. Though the manifold itself is contructed of solid metal rather than a plastic resin, these cars still sometimes encounter intake manifold related problems: -The aluminum intake manifolds tend to collect combustion debris internally clogging upwardly the EGR passages. This trouble is essentially unheard of on the later cars with the plastic intake manifolds. Also note that downgrading a afterward automobile to the early solid aluminum intake manifold is non really a viable solution: -The throttle torso is turned at a different angle For performance minded individuals, besides note that the early 1992-1995 intake manifolds are somewhat restricted in airflow compared to the later units. This will lower engine horsepower & torque to some extent. //////
-The aluminum corrodes around where intake manifold connects to the cylinder head coolant passages. If corrosion is bad plenty, you'll have external leaks.
-The gaskets in between the intake manifold and cylinder heads can "dry upwards" and start to leak. Most of the later cars will take had their intake manifolds replaced by at present, and will have had new gaskets installed every bit function of the intake manifold replacement procedure.
-The heater core return hose which runs underneath the intake manifold has a rubber department that attaches to the back of the waterpump. The rubber changes texture as it gets older, and it's not uncommon on a 15+ twelvemonth old crownvic to discover your intake valley full of engine coolant from a leak in this part. Many technicians will misdiagnose a leaky under-intake-manifold-hose as bad freeze cadre plugs. And to repair this hose, you have to remove the intake manifold. 1998+ crownvics accept a solid metallic coolant return tube nether the intake manifold that rarely fails fifty-fifty in the "rust belt".
-The egr system hardware is dissimilar
-Wiring harnesses are different lengths to accomadate the different component layout.
-Many parts for the 1992-1995 cars such every bit accelerator cables are obsolete and no longer avaliable every bit service parts from ford.
-The 2001+ cars have performance improved (PI) heads with different shaped ports on the cylinder heads than the 1992-2000 cars did.
/////
If you read through internet crown victoria bulletin forums, you'll encounter some people maxim that replacing the intake manifold on their car is actually like shooting fish in a barrel. Notwithstanding you'll find other people claiming that their car never ran properly after they attempted to replaced their ain intake manifold. Here are a few tips about this project: -Do not use pneumatic air affect wrench to TIGHTEN whatever of the bolts. Use merely manual paw tools instead. This volition have a little scrap extra time, just considerably lower your chances of stripping out the threads in the aluminum cylinder heads. -Utilize a torque wrench to ensure that the bolts are tightened to the proper specifications. -Follow the sequence listed in the factory shop manual for the last tightening sequence for the intake manifold->cylinder caput bolts. -You lot volition likely have problems removing the two really long bolts which hold the upper radiator hose gooseneck to the intake manifold. A pneumatic air touch on wrench with the pressure regulator set really low can commonly break these bolts free without snapping them. If you lot stick a socket with a really long breaker bar on these bolts, it's likely that yous'll snap the bolt in half. Removing the broken bolt remnants will exist a big project considering these bolts are threaded direct into the cylinder head underneath the intake manifold. -1998 and later on cars have a factory installed "crash bracket" covering the rear of the driver's side fuel rail. You demand to remove this bracket earlier the intake manifold will come out of the motorcar. You will find this subclass easier to remove if you pull out the windshield wiper housing first. -Carefully annotation where each wiring & vacuum harness goes earlier removing them. Take pictures with your photographic camera if you lot are not familar with these cars. -The egr valve oft doesn't desire to seperate from the tube which connects to the exhaust manifold. This is not usually a problem because the bolts which hold the egr valve to the intake plenum commonly seem to turn freely. Yous volition need a new egr valve gasket if y'all elect to use this method though. -If you are in a professional person repair shop enviroment, in that location is an culling to removing the egr valve from the plenum. Utilise an oxy-acetylene torch to heat the egr tube nut until it's a dull carmine color. The egr tube nut should then spin freely while everything is still hot. Article of clothing gloves with thermal insulation and be careful not to hurt yourself during this chore though. -If you lot have back problems, you'll probably want to take your car to a repair shop for this repair. During the intake manifold bandy, y'all'll be standing with your dorsum bent over your car's fenders for a few hours. -If you're working outside, look at the weather forecast before beginning the project. Yous will accept the intake manifold ports open straight to the atmosphere. If information technology starts to pelting really heavy during the projection, you could go lots of water inside your engine. -It would be a adept thought to purchase a new set of heater core hoses earlier beginning this project. Later rubber hoses have been installed for several years, they often won't seal properly when they are reinstalled onto the new intake manifold. //////////////// http://www.p71interceptor.com/alternator/convert4g6g Note that the aftermarket dorman/motormite intake manifold kit contains a universal alternator bracket which fits both 4G and 6G alternators.
///////////
in the 1992-1997 crownvics, some taxicab companies devised a quick & dirty hack to fix leaking under intake manifold heater core render hoses. first they would remove the old leaking heater core hose from the waterpump nipple. then they would install generic heater cadre flex hose onto the waterpump nipple and run the hose outside the engine valley to the tube on the heater core well-nigh the firewall. this solution was functional, simply didn't wait very nice.
//////////////
Part Numbers
Nether Intake Manifold Heater Core Return Tubes
1992-1995 F1AZ-18B402-AF (supercedes F1AZ-18B402-A)
1996-1997 F6AZ-18B402-AC
1998-2000 F8AZ-18B402-BA (o-rings are W704593-S100)
2001-2002 1W7Z-18663-AA
2003-2009 3W7Z-18663-BA (to 04/06/2009)
2009-2010 9W7Z-18663-A (from 04/06/2009)
Water Pump->Heater Core Render Nipples
1992-1997 F1VY-8555-A (waterpump -> under intake tube)
1998-2010 F75Z-8555-AA (waterpump -> nether intake hose tube. includes two W704593-S100 o-rings)
"water bypass tube"
"pi coolant nipple"
H2o Pump O-ring - F1VY-8507-A
Note: As of august 2022, it is less expensive to buy a F75Z-8555-AA water pump nipple which includes two W704593-S100 o-rings than to buy the two W704593-S100 o-rings seperatetly.
/////////
Ford oem crownvic intake manifold kits (Part Numbers current as of 02/08/2010)
1996-1997 F8AZ-9424-AAA (Kit to replace plastic intake) (two holes in coolant crossover)
1999-2000 F8AZ-9424-BAA (4G Civilian Alternator "Straight Fins In Example") (1998 civilian crownvics have 6G alternator use F8AZ-9424-CA kit) (2 holes in coolant crossover)
1998-2000 F8AZ-9424-CA (6G Police Alternator "Curved Fins In Case") (2 holes in coolant crossover)
1996-2000 F8AZ-9424-CB (Blank intake. No other parts included. Used to supervene upon service intake manifold with aluminum cross over.) (2 holes in coolant crossover)
2001-2002 1W7Z-9424-AAA (4G Civilian Alternator) (only ane coolant sensor hole in crossover)
2001-2002 1W7Z-9424-BA (6G Police Alternator) (only 1 coolant sensor hole in crossover)
2003-2005 3W7Z-9424-AE (foam dissonance shield included for engine knock sensor) (only one coolant sensor hole in crossover)
2006-2009 6W7Z-9424-AA (From 06/19/2006 to 07/21/2008) (no holes in coolant crossover. engine temperature computed using coolant head temperature sensor data)
2009-2010 9W7Z-9424-A (From 07/21/2008)
/////
1998-2000 crownvics simply utilize 1 sensor in the intake manifold coolant crossover to measure coolant temperature. The other hole in the coolant crossover is unused and has a metal plug in it.
The 1996-1997 crownvics use both holes in the coolant crossover, and accept 2 coolant temperature sensors. 1 sensor is for the engine computer, the other for the temperature guage on the instrument cluster.
1998-2000 lincoln towncars do not have any coolant temperature sensors installed in the front end coolant crossover. Both holes have metal plugs installed in them and engine temperature is computed using data from the under-intake-manifold cylinder head temperature sensor.
Having two sensor mounting holes in the coolant crossover makes the aforementioned intake manifold compatible with a wider range of vehicles. Unused sensor holes can simply be plugged up and non crusade any harm.
/////
Thermostat Parts
1996-2006 N811011-S309 Thermostat gooseneck bolt
2007-2010 W704693-S437 Thermostat gooseneck bolt M8x95mm
1992-2010 F1VY-8255-A Thermostat gasket (RG-571)
1992-1995 F1VY-8592-AA Gooseneck
1996-2000 F6AZ-8592-AB Gooseneck
1998-1998 F6ZZ-8592-C Gooseneck
2001-2008 1W7Z-8592-AB Gooseneck (To 12/03/2007)
2008-2010 9L3Z-8592-B Gooseneck (From 01/02/08)
/////////////
Suggested article revisions from DetroitP71
one. Include torque values, if you don't have them, I exercise and they are also listed in the BOK "common torque values" you could include a link to this post.
2. Include Intake manifold torque sequence order. This society is not the same for all years. I don't know where the change happend, maybe NPI to PI? I have a picture posted that shows both side to side. IMO it is related to the crash bracket introduction.
iii. This is a proficient time to replace the injector O-rings. I should take pictures for that. O-rings are not cheap though and you will need ii numberless. Fuel-rail in my case did not have to exist removed I just moved it to the side.
Same for plugs, they should at least be checked. The leaking coolant could take caused some missfires, it did on mine, I even had a bad COP that I replaced a week or so subsequently.
iv. Not sure if you want to include this but I would not suggest using a Dorman for PI replacements. In that location is a very cheap source; Fordracingparts.com (less them fifty% of dealer pricing) or ADTR. Or get a Ford OEM part from TascaParts.com, all the same a lot cheaper then the dealer.
5. There are issues with the brass heater hose insert leakage. There is a picture on CVN that shows a ceative ready for this. If yous want it I can look it up.
six. Practiced point of taken the wiper tray out (good time to make clean it out) take you seen what I found in at that place? But if you are working outside, like y'all pointed out this can be a take a chance. How virtually merely roofing upwards the hood of the car with a tarp or a partial tarp. Pelting is 1 affair just I had to deal with snowfall that then accumulates and freezes.
seven. When people work on this they might be inclined to clean the plenum and Throttle torso inside. The Trottle body and throttle valve should not be cleaned sice they are coated. However EGR passages should be inspected and cleaned.
//////
Closeup pictures of a crownvic intake plenum, egr valve, egr tube and exhaust manifolds are avaliable on this webpage.
/////
In that location is documentation about replacing a 1997 mercury grand marquis intake manifold online at: http://world wide web.autoclinix.com/Manifold.htm
/////
it has been mentioned that yous do not need to remove the windshield wiper transmission from the 2003+ crownvics to access the fuel rail crash bracket bolt on the back of the engine. the 2003-2010 cars have a unlike low profile windshield wiper housing than the 1992-2002 cars do. as well the dissimilar seats and tires/wheels, you lot can identify a 2003+ crownvic in the parking lot past how the windshield wipers park. in the 2003+ cars, the windshield wipers stay raised on the windshield even when they're turned off. they do not entirely retract into the shaded portion of the windshield similar they do in the 1992-2002 cars.
/////
Question & Answer
Can I impress out this document?
Yes, printing is allowed. Digital Rights Management (DRM) is non implemented on this particular webpage. Merely do note that you volition need shut to a hundred sheets of paper to print a complete copy of this document.
Is this certificate intended to supervene upon the ford store manual procedure for intake manifold installation?
No. This document is intended to be a supplement to the ford store manual.
Why are acronyms like EGR, zip tube, and other words that I don't sympathize used in this document?
This webpage is constructed with the supposition that the reader has lots of background knowledge in automotive technology. Being an automotive service technician is a highly skilled trade despite the low wages and long work hours that people in this field often encounter. It should be noted that at that place are numerous websites that teach a bones understanding of auto mechanics. Some specialty sites like www.crownvic.net will cater specifically to your crownvic likewise.
How many miles can I expect to get out of my intake manifold before information technology fails?
Unknown. This depends on a variety of factors including:
-Heat Load (i.e. Phoenix, Arizona versus Bangor, Maine)
-Engine Idle Time
-Mileage
-Driving Style (Young male person teenager driving with many difficult wide open up throttle runs versus an older grandmother driving and never getting over 3000 RPM)
-Number of cold starts (The engine goes through an expanision/wrinkle bike every time information technology is started/stopped)
-Revision of the intake manifold (Ford has released several different intake manifolds for these cars)
-A randomness factor
Do the intake manifolds with the aluminum crossover ever fail?
Yes. Failure points include:
-the nylon resin in the area that the heater core hose connects
-the nylon resin that'south wedged in between the aluminum crossover and the aluminum cylinder heads
-the o-rings which seal the aluminum crossover to the nylon resin underneath
Should I purchase a "pre-owned" intake manifold from a salvage 1000?
No. This is not a recommended practise. But if funding is really limited, this could be a temporary fix to go your broken automobile dorsum on the route for a little while.
My mechanic offered to install a "recycled" intake manifold on my automobile to "salve me some money". Should I take advantage of this offer?
If you depend on your car for daily transportation, this is not a good repair choice. Intake manifolds on these cars are wear items, and you lot do not know how much life remains in a junkyard intake manifold. So you could end up paying the installation labor accuse twice (one time y'all install the junkyard intake, and again when the junkyard intake manifold fails and has to be replaced). Your mechanic was a smart person to recommend the "recycled" intake, he knows how to maximize his repair labor income at your expense. He likewise knows how to create income for his friend the tow truck commuter.
I was browsing craigslist and institute an ad for an intake manifold that is listed as fitting all 1998+ crownvics. Should I purchase this intake manifold to supplant the broken one on my 2004 crownvic?
No. The seller in the craigslist advertising is giving you wrong application information for the intake manifold. In that location is not a single intake manifold model that fits every 1998 and afterward crown victoria without modification. To ensure that yous go an intake manifold that is compatible with your automobile, you should purchase from a reputable parts vendor like your local ford dealership, napa, autozone, pepboys, rockauto.com, etc.
How much will my local ford dealer charge to install a new intake manifold on my auto?
Ford has a handful of dissimilar crownvic intake manifold kits avaliable, just virtually of these cost somewhere effectually $600. So with a few hours labor, figure a little over $1,000 for this repair. Having the aftermarket dorman intake manifold kit installed at an aftermarket repair shop may exist a piffling cheaper. Simply you increase your risk of unforseen problems by using an aftermarket repair store because some of the technicians at these shops have never installed a crownvic intake manifold before.
Are at that place cars with more severe intake manifold problems than the crownvic?
Yes. Some owners of vehicles with the full general motors 3800 engines accept expierenced hydrolocked engines after intake manifold failure. In those cars, hot egr gasses fatigue the intake manifold which allows liquid coolant to flow into the air intake ports. On the crownvic, intake manifold failure causes an external leak by contrast.
Can I stop an intake manifold leak by using a $3.99 tin of coolant finish leak product from pepboys?
No. This solution is not likely to be effective. Merely yous do run the risk of overheating your engine with this solution. Click here to view some pictures of a radiator that'south really plugged upwards from lots of end leak product existence installed.

Source: https://www.idmsvcs.com/2vmod/intakemanifold/replace/pictures/index.html
Posted by: belcheralwastion.blogspot.com
0 Response to "How To Repair Plastic Manifold On Crown Victoria"
Post a Comment